
How to Send Photo Galleries to Clients with Dubsado

By Ema Katiraee, Certified Dubsado Specialist
TL;DR: Dubsado isn't a gallery delivery platform, but you can use it to send gallery links to clients in two ways: custom mapped fields (recommended) or one-time links. Here's how to set up both.
As a photographer, you might be using a handful of tools to manage your business. A CRM, gallery delivery software, project management tools. It can feel like you’re constantly switching between systems just to get one job done.
But with Dubsado, you can simplify part of that. Even though it isn’t a photo delivery platform, you can use it to send galleries in a clean, professional way that keeps everything in one place.
There’s still a manual step involved since you’ll need to add each gallery link to the client’s project, but once that’s done, the rest can run easily - especially when using automated workflows.
How to Share Photo Galleries using Dubsado
You can deliver photo galleries inside Dubsado using one of two methods:
Option 1: Custom Mapped Fields
This is the option I typically set up for photographers because it keeps things simple and consistent. You can save each client’s gallery link directly in their project, and then have that link automatically appear in any email or form that uses a smart field.
The best part is you only need to add the link once. After that, any time you send a template with that smart field, Dubsado will pull in the right link for that client. You can even turn it into a clickable button for a more polished look.
Step 1: Create the custom mapped field:
Go to your Settings
Go to Custom fields
Click + New project field
Name the field something like “Gallery Link” and select Short Answer as the type
Click Create
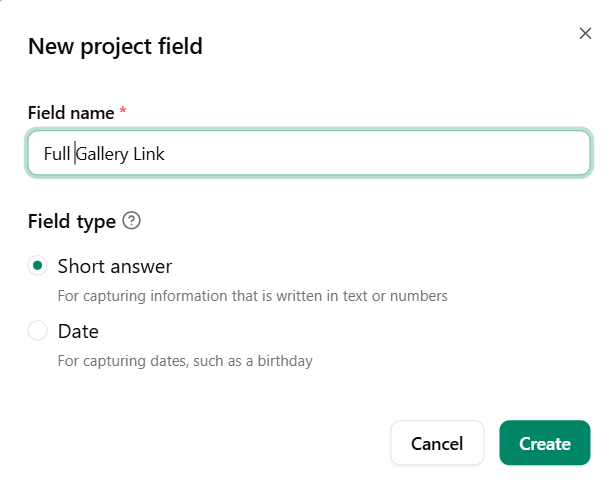
Create a custom mapped project field for the gallery link
Step 2: Add the field to your email or form template
Open your email or form template
Inside the email composer or form text box, click Smart Fields → Project → choose the filed you just created (see image below)
The smart field will now appear in the email or form. Once you add information to the field (see below steps) and send out the email or form, Dubsado will replace the smart field with the gallery link for that client
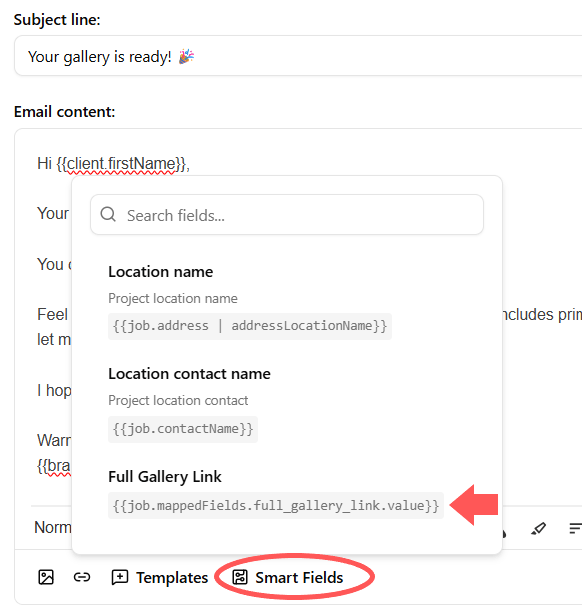
Where to locate your project custom mapped fields
Optional: Turn it into a clickable link or button
Cut (Ctrl + C) the smart field text from the email or form
Type the text you want to use as the link or button, like “View Full Gallery”
Highlight that text
Click Insert Link in the formatting toolbar and paste the smart field into the URL field.
Select Button and Open in new tab (recommended)
Click Save
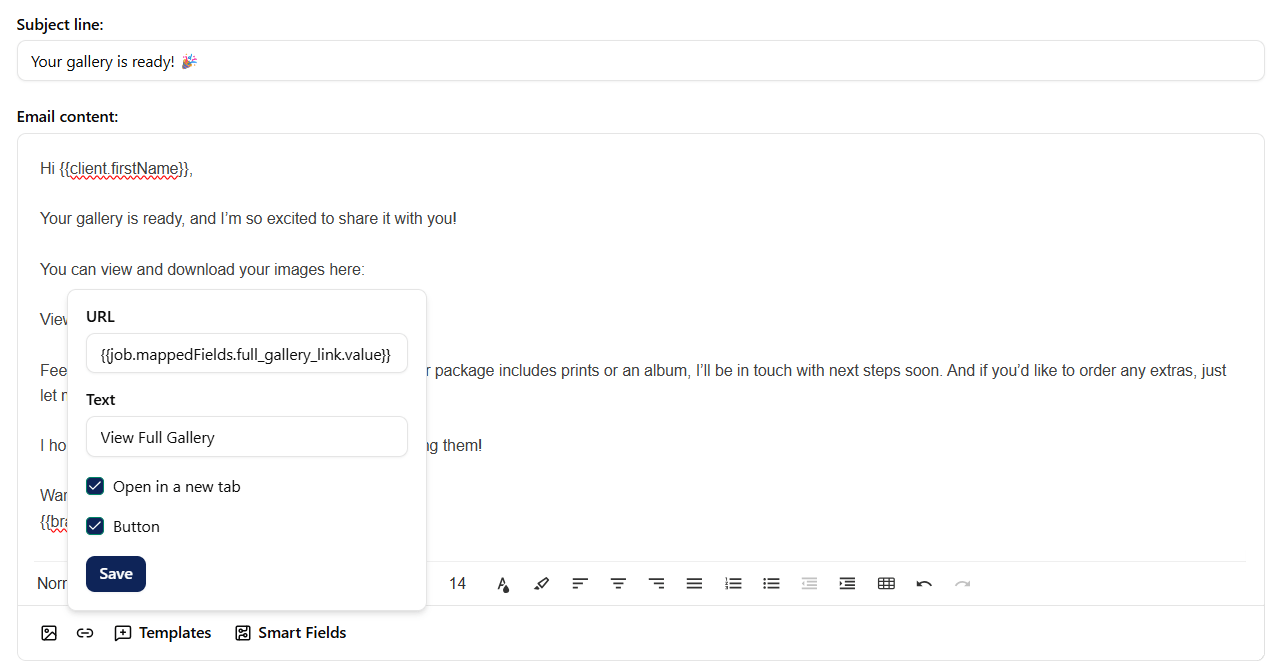
Add the mapped field as a URL link to a canned email template (can also do this for forms)
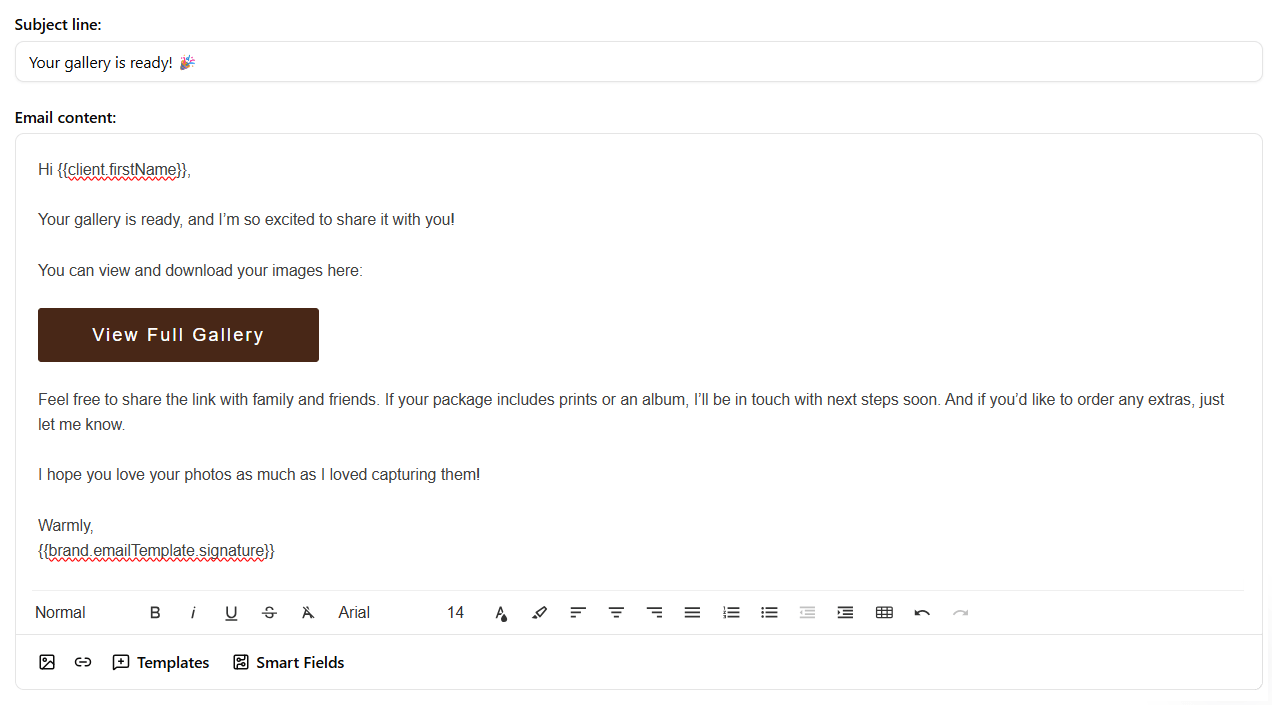
How the canned email template looks once you add the button
Step 3: Add the gallery link to the client’s project
Go to the client’s project in Dubsado
Click the pencil icon beside Custom fields
Paste the full gallery link into the field you created
Be sure to include the full URL with https:// so Dubsado recognizes it as a link
This is the only manual part. You’ll need to paste the link into the client’s project when their gallery is ready. After that, Dubsado takes care of the rest.
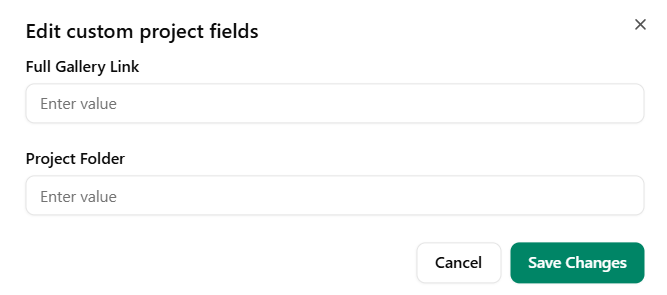
Add gallery link to client’s project mapped field
Step 4: Send the gallery to your client:
Send the email or form as usual. Wherever you inserted the smart field, Dubsado will now display the actual link to their gallery
Option 2: One-Time Links
If you’re using the client portal throughout your entire client process and want the gallery to appear there too, this method is for you. It’s quick to set up and easy for clients to access.
To create a one-time link:
Open the client’s project in Dubsado and go to the Forms tab
Click +Add a Form → select New form → click Start from scratch instead
Select Link from the menu → click Create form
Add a title like “Your Gallery” and paste the gallery link
Click Create
Then either click Send to email it to the client, and / or Apply to Portal to display it in their portal
Tutorial: How to Send Photo Galleries to Clients with Dubsado
In this video, I walk you through the two main ways to send photo galleries to your clients using Dubsado. I show you exactly how to set up custom mapped fields, when to use one-time links, and which option I recommend for most photographers. Watch the full tutorial below to see both methods in action.
Want to See What Else Dubsado Can Do for Photographers?
For a full overview of how Dubsado works for your photography business, read Dubsado for Photographers: The Complete Guide.
Want Dubsado to work better for your photography business?
If you’re spending too much time on admin and not enough time behind the camera, let’s fix that. I work with photographers to build Dubsado setups that fit the way you already work and help everything run more smoothly.
Whether you need help with workflows, client communication, or just getting organized, we can make Dubsado feel like it was built for your business.
Book a discovery call and we can chat about what a Dubsado setup looks like and how it can help your business.