Dubsado Client Portal: A Complete Guide for Business Owners
Last Updated December 2025 | By Ema Katiraee, Certified Dubsado Specialist
The Dubsado client portal is one of those features that doesn't always get talked about as much as proposals or workflows, but it quietly does a lot for the client experience.
It gives your clients one place to find everything related to their project - no more "can you resend that invoice?" or "where do I find the contract I signed?"
If you're new to Dubsado, start here first: what Dubsado is and how it works for service-based businesses.
Disclosure: This post contains affiliate links, which means I may earn a commission if you click through and make a purchase. This comes at no additional cost to you.
What is the Dubsado Client Portal?
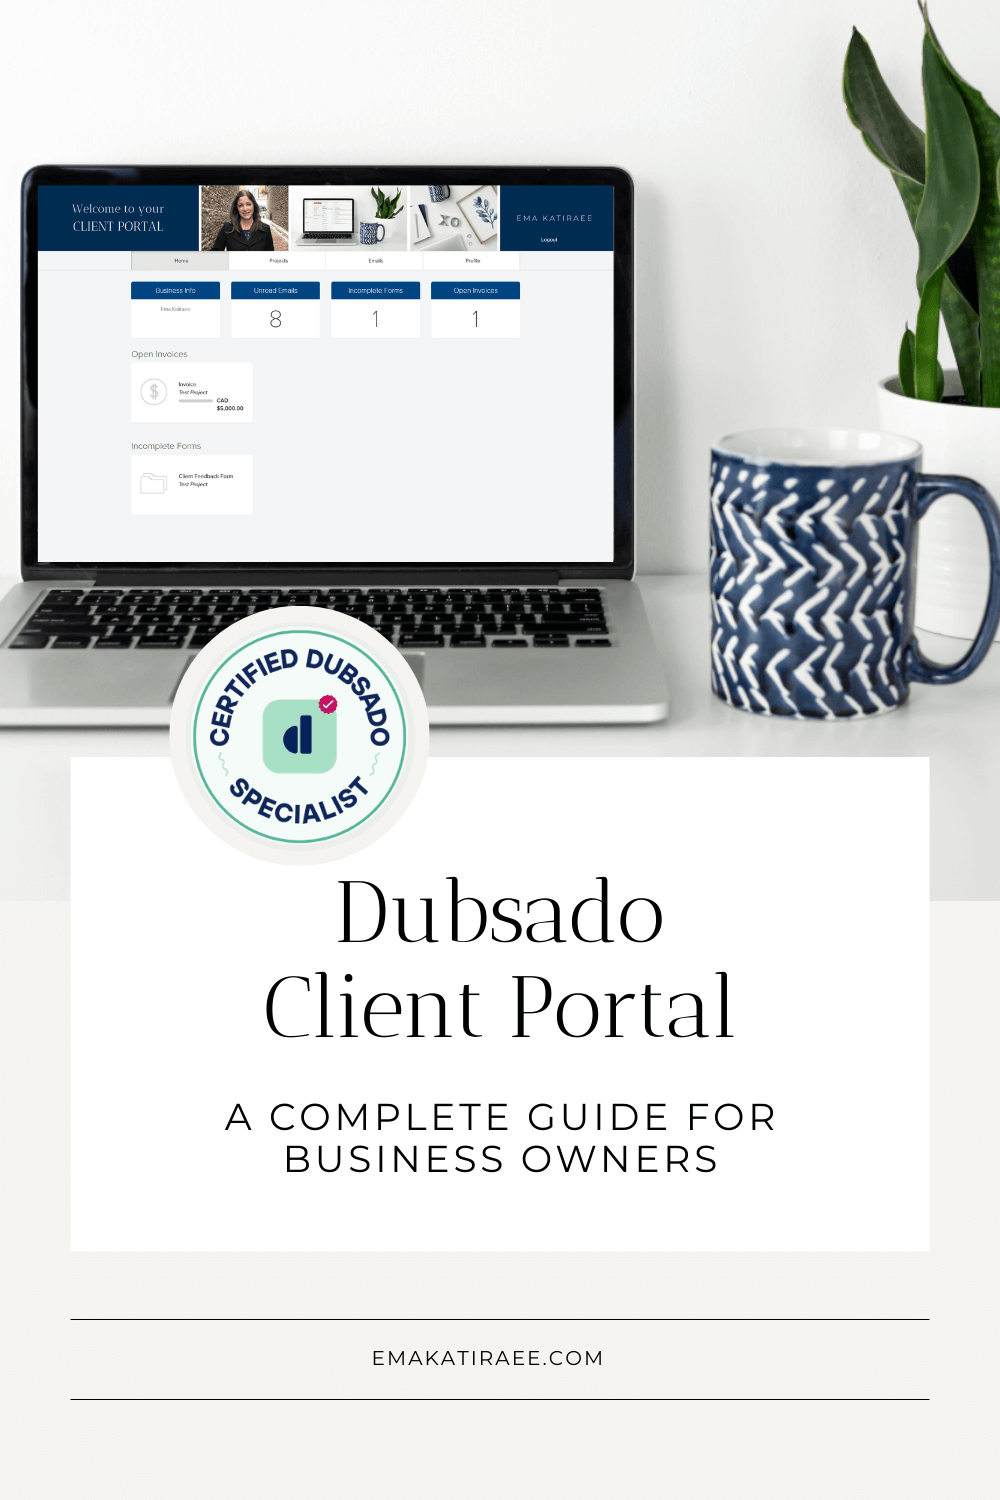
The client portal is essentially a private hub for each of your clients. Once activated, they can log in and see everything related to their project in one place.
Here's what's visible to clients inside the portal:
Invoices
Appointments
Project information
Personal information they've provided (name, address, phone, email) - they can also update this themselves
Email threads
Contracts, proposals, and questionnaires - once sent or applied to the portal
Shared task boards
A few things that are not visible to clients: your internal notes, to-do lists, and call logs. Those stay on your side only.
Clients access the portal through a direct Dubsado login link, which you can send to them or embed directly on your website. The portal can be password protected, and you can set the password for your client if needed.
How do You Activate the Dubsado Client Portal?
You need to activate the portal individually for each new client. You can do this manually inside the project, or automate it through a workflow (which I'd recommend once your setup is dialed in).
To activate it manually:
Open the client's project and find the Portal section.
Click the dropdown arrow beside it and select “Activate”.
Click the dropdown again - from here you can either click "View" to preview the portal, or "Send" to email the client their login link and password.
When you click "Send," a pre-written email will pop up with the portal link and password already included. You can customize it before hitting send.
How to Customize the Dubsado Client Portal
Dubsado lets you brand the client portal with your own colors, logo, and banner images. It's a small detail that goes a long way in making your client experience feel polished and consistent.
To access portal settings, go to Settings (gear icon) > Portal in the left-hand menu.
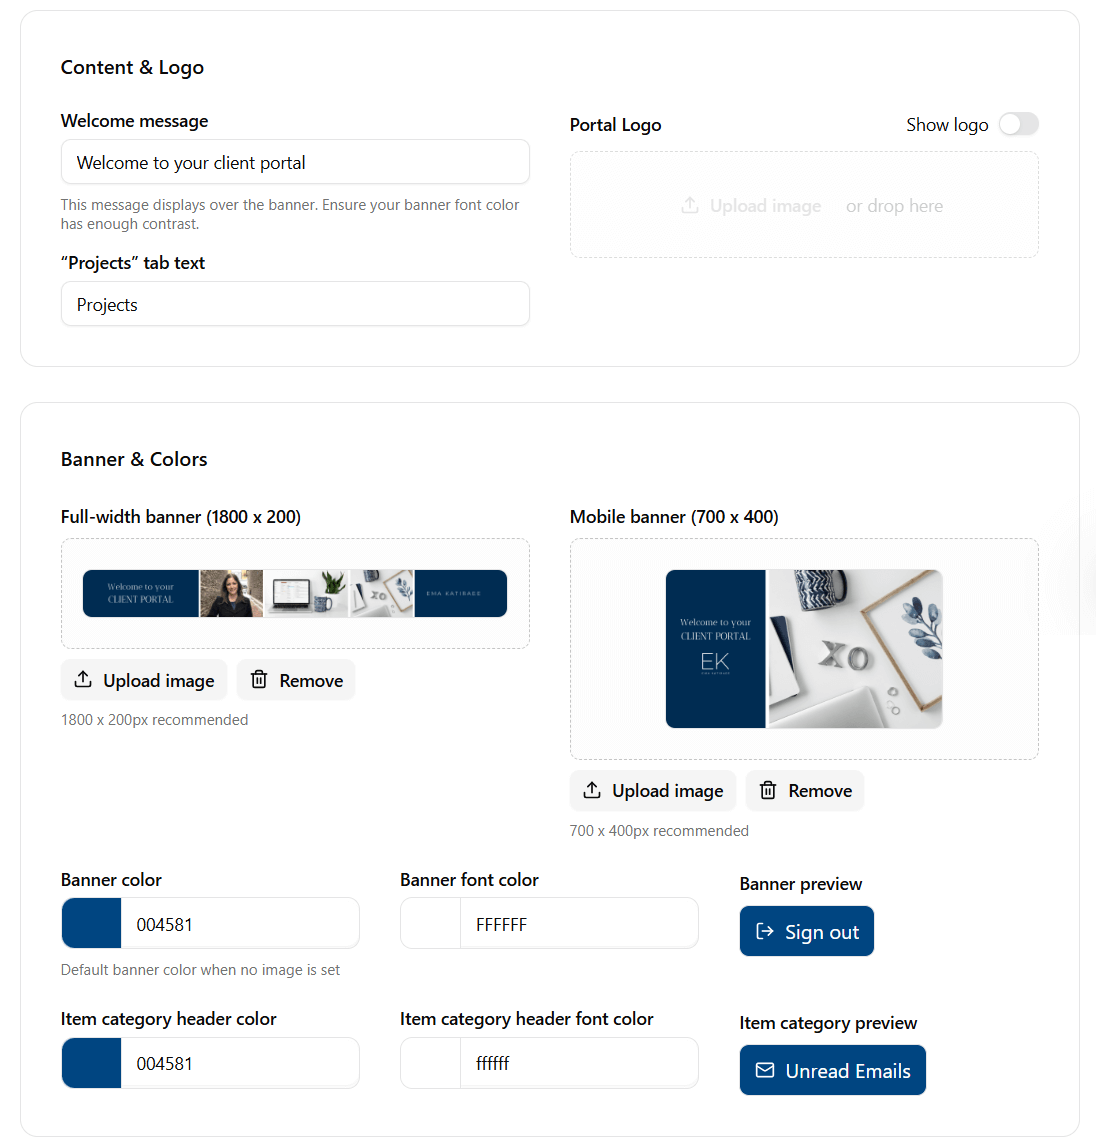
Dubsado client portal settings
Here's what you can customize:
Welcome message: Write your own welcome message or hide it entirely. Hiding it makes sense if your banner design already includes text.
“Projects” tab text: If you'd rather the portal say something other than "Project," you can change the label here. Useful if your brand language uses different terminology.
Portal Logo: Upload a different logo for the portal - this is helpful if you have a dark banner and need a white version of your logo to show up properly. You can also hide the logo altogether - do this if your banner design already includes it or if it would overlap awkwardly. If you don't upload anything here, Dubsado pulls your logo from your default brand settings.
Full-width banner (Desktop): Upload your desktop banner here. The size is 1800 x 200 px. One thing to keep in mind: the right side of the banner can get cut off on some devices, so keep your most important design elements on the left.
Because this banner is wide and short, full background images tend to get cropped in a way that doesn't look great. A pattern or a layout with several smaller images works better.
Mobile banner: Upload a separate banner for mobile at 700 x 400 px. I'd recommend creating both - the experience on mobile is noticeably different without it.
Banner color: This is the fallback color that shows if no banner image is uploaded.
Banner Font Color: This affects the welcome message text and the "Logout" button color.
Item category Header Color: The four summary tabs at the top of the portal (Business Info, Unread Emails, Incomplete Forms, Open Invoices) pull this color.
Item category header font color: The text color inside those summary tabs. Make sure there's enough contrast between this and the header color so the text is actually readable.
How do You Design a Dubsado Client Portal Banner in Canva?
If you want to add your own branding, Canva is the easiest way to create your portal banners. Here's a quick recap of the sizes:
Desktop: 1800 x 200 px - keep key design elements on the left side
Mobile: 700 x 400 px
Once your banners are ready, export them as a .png or .jpg and run them through an image compressor like TinyJPG before uploading into Dubsado. Compressing the files keeps your portal loading quickly.
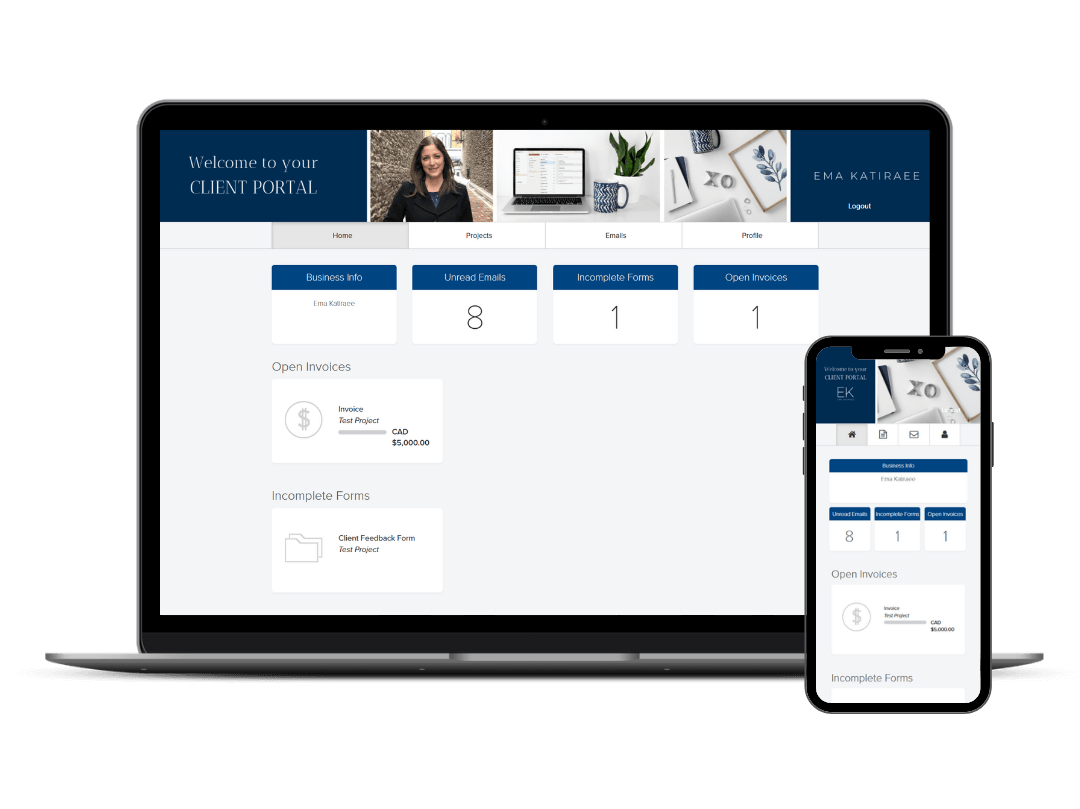
How Dubsado’s client portal banners look on desktop and mobile
How to Add the Client Portal to Your Website
Having your client portal accessible directly from your website means clients can log in without needing to dig through their inbox for a link. There are two ways to do this.
Go to Settings > Portal > Links and Embed Code.
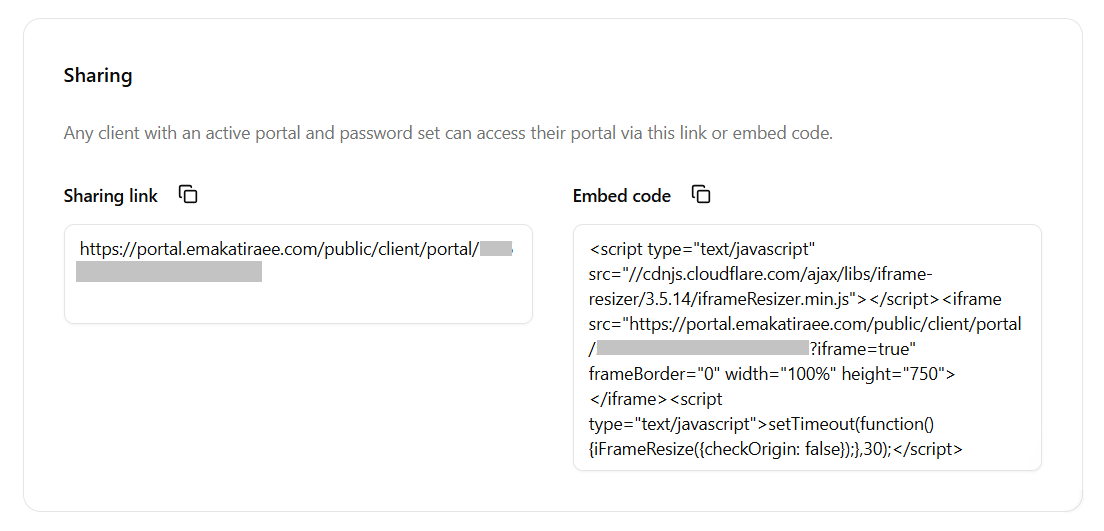
Dubsado client portal sharing options
Portal Link A direct URL to your client portal. Add it to your website navigation, footer, or a dedicated "client login" page. Clicking it takes clients to the Dubsado portal log in page.
Portal Embed Code Paste this into a code block on your website and the portal login will appear directly on your site - no external redirect to Dubsado. It's a cleaner experience for clients and keeps them on your site.
Tutorial: How to Customize Your Dubsado Client Portal
Here is a quick tutorial to customize the settings of your Dubsado Client Portal. I'll go over how to create a client portal banner in Canva.
Sign Up for Dubsado
If you're not on Dubsado yet, use my code EMAKATIRAEE to save 30% off your first month or year.
Frequently Asked Questions
What is the Dubsado client portal? The Dubsado client portal is a private hub where clients can log in and access everything related to their project in one place, including invoices, contracts, questionnaires, appointments, and email threads.
How do clients access the Dubsado portal? Clients access the portal through a login link you send them, or through a link you add to your website. You can also set a password for them if needed.
Can I brand the Dubsado client portal? Yes. You can upload your logo, add a custom banner for both desktop and mobile, set your brand colors, and customize the welcome message. The portal can be fully branded so clients never see the Dubsado name.
How do I add the client portal to my website? Go to Settings > Portal > Links and Embed Code. You can either add a direct portal link to your navigation or footer, or paste the embed code into a code block on your website so the login appears directly on your site.
Does the Dubsado client portal work on mobile? Yes. You can upload a separate mobile banner at 700 x 400 px to ensure the experience looks good on all devices.
Want Help Setting This Up?
The client portal is one piece of a full Dubsado setup - and when everything is connected and working together, it makes a real difference in how smooth your client experience feels. If you'd rather hand the whole thing off to an expert, that's exactly what I do.
I work with photographers, wedding planners and other service providers to build out their full Dubsado setup, so everything from the first inquiry to the final offboarding is taken care of. See what's included in a done-for-you Dubsado setup.
Book a free 20-minute discovery call and we'll talk through what you need.
