How to Deliver a Lead Magnet using Kit (formerly ConvertKit)
TL;DR: To deliver a lead magnet in Kit, you'll create a form, set up the incentive email (and customize it so it doesn't sound like a robot wrote it), attach your lead magnet, and embed the form on your website. It takes less than an hour and it's 100% worth it. Keep reading for the step-by-step breakdown.
You finally created a lead magnet. Maybe it's a free checklist, a mini guide, a Canva template, or a resource library you've been putting off for months. Either way, it exists now, and that is worth celebrating.
But now what? How do you actually get it into people's hands?
That's where Kit comes in. Kit (formerly ConvertKit) is an email marketing platform built for creators and small business owners, and it makes delivering a lead magnet pretty straightforward once you know where everything lives. The tricky part is that Kit's interface has a lot going on, and figuring out the incentive email setup in particular can be a little confusing the first time around.
This post walks you through the whole process: creating a form, customizing the confirmation email, attaching your lead magnet, and embedding the form on your website.
Disclosure: This post contains affiliate links, which means I may earn a commission if you click through and make a purchase. This comes at no additional cost to you. I only recommend tools I genuinely believe in.
Why Kit?
There are a lot of email marketing platforms out there, so it's fair to ask why Kit specifically.
Kit is built with simplicity in mind. It's not trying to do everything for everyone. Its visual automation builder is intuitive, the tagging and segmentation system is clean, and the free plan is genuinely useful for people just getting started. If you're a photographer, wedding planner, or creative entrepreneur looking for an email platform that doesn't require a tutorial just to send a broadcast, Kit is a solid choice.
Ready? Here's how to set it all up.
Watch the Tutorial
Prefer to watch instead of read? I put together a full video tutorial walking you through every step. Go ahead and watch it first, then use the written steps below as a reference if you need to pause and double-check anything.
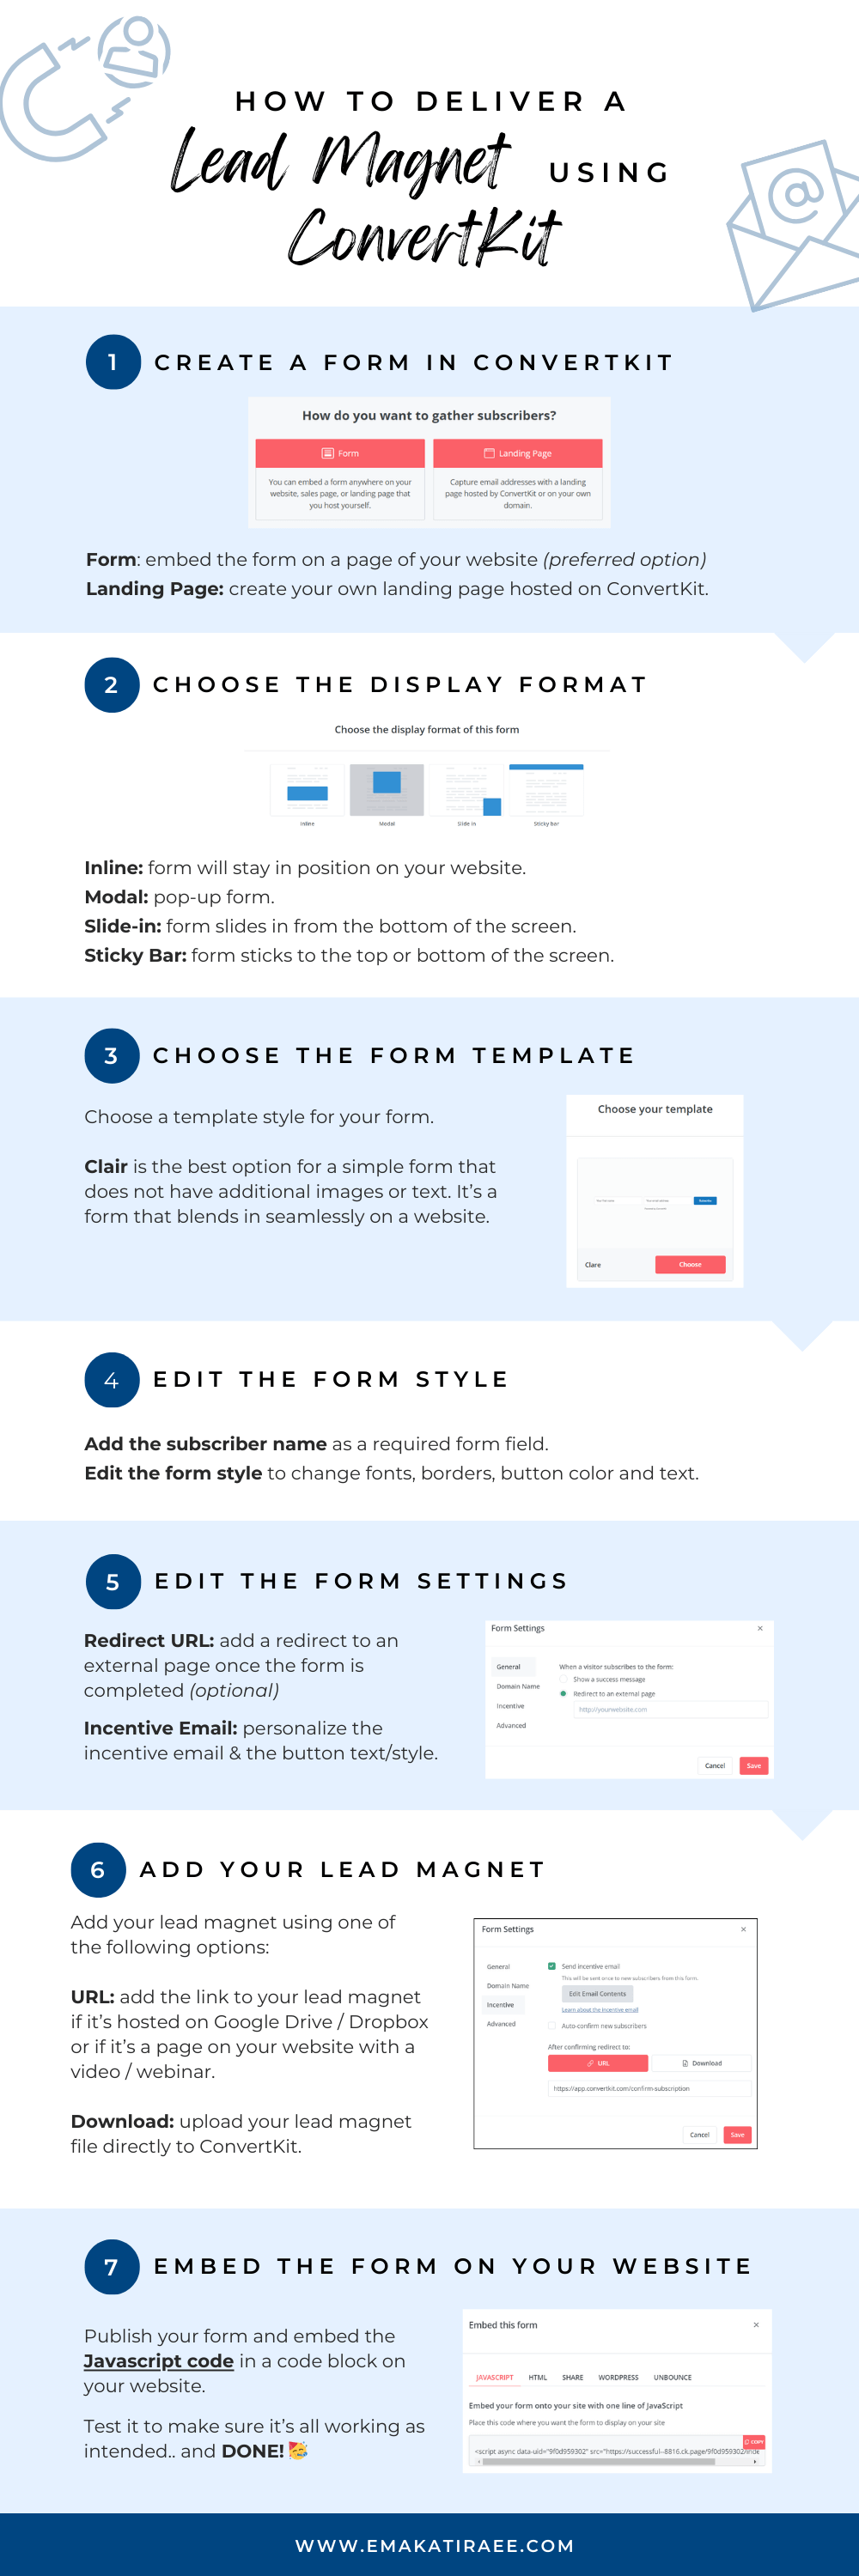
Step 1: Create a Form in Kit:
Create a New Form:
In your Kit account, navigate to Grow then to Landing Pages & Forms, and Click + Create New, and select ‘Form’.
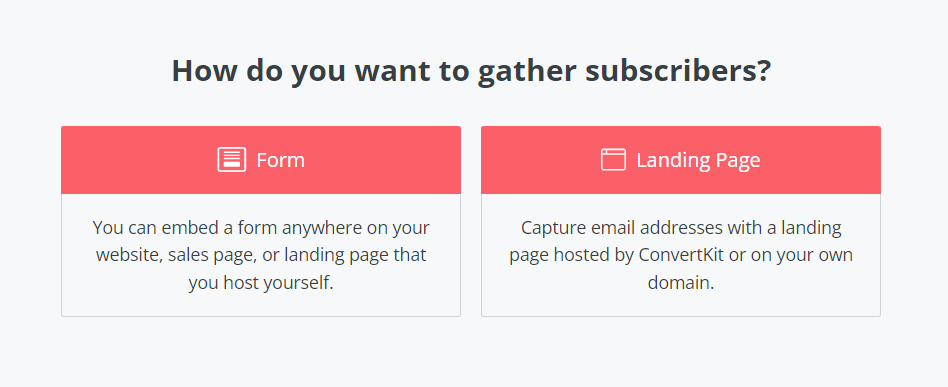
Click '+ Create New' and select Form to get started
Choose Your Display Format
Kit gives you four display options:
Inline - stays in place on the page; easiest to embed in a section of your website
Modal - pops up as an overlay
Slide In - slides up from the bottom of the screen
Sticky Bar - sticks to the top or bottom of the screen
For most websites, Inline is the cleanest option.
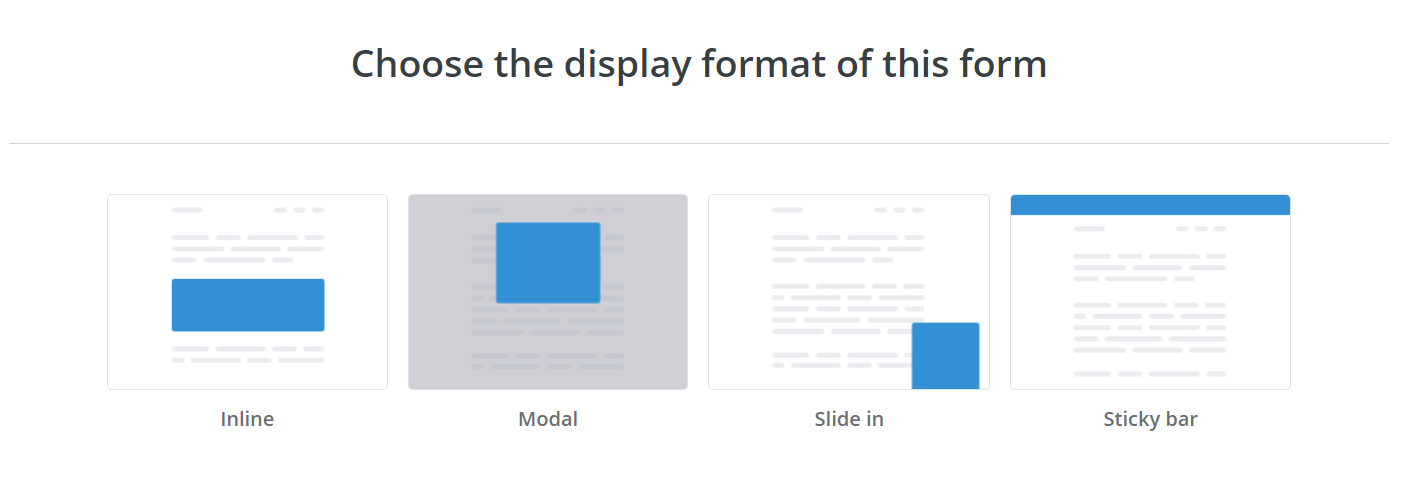
Choose Inline if you want to embed the form directly on your website
Choose a Form Template
If you're embedding the form directly on your website, the Clair template is your best friend. It's minimal, with no extra images or text that would look out of place on your existing site. If you don't have a website yet and plan to send people directly to the form URL, feel free to use any template and style it however you like.
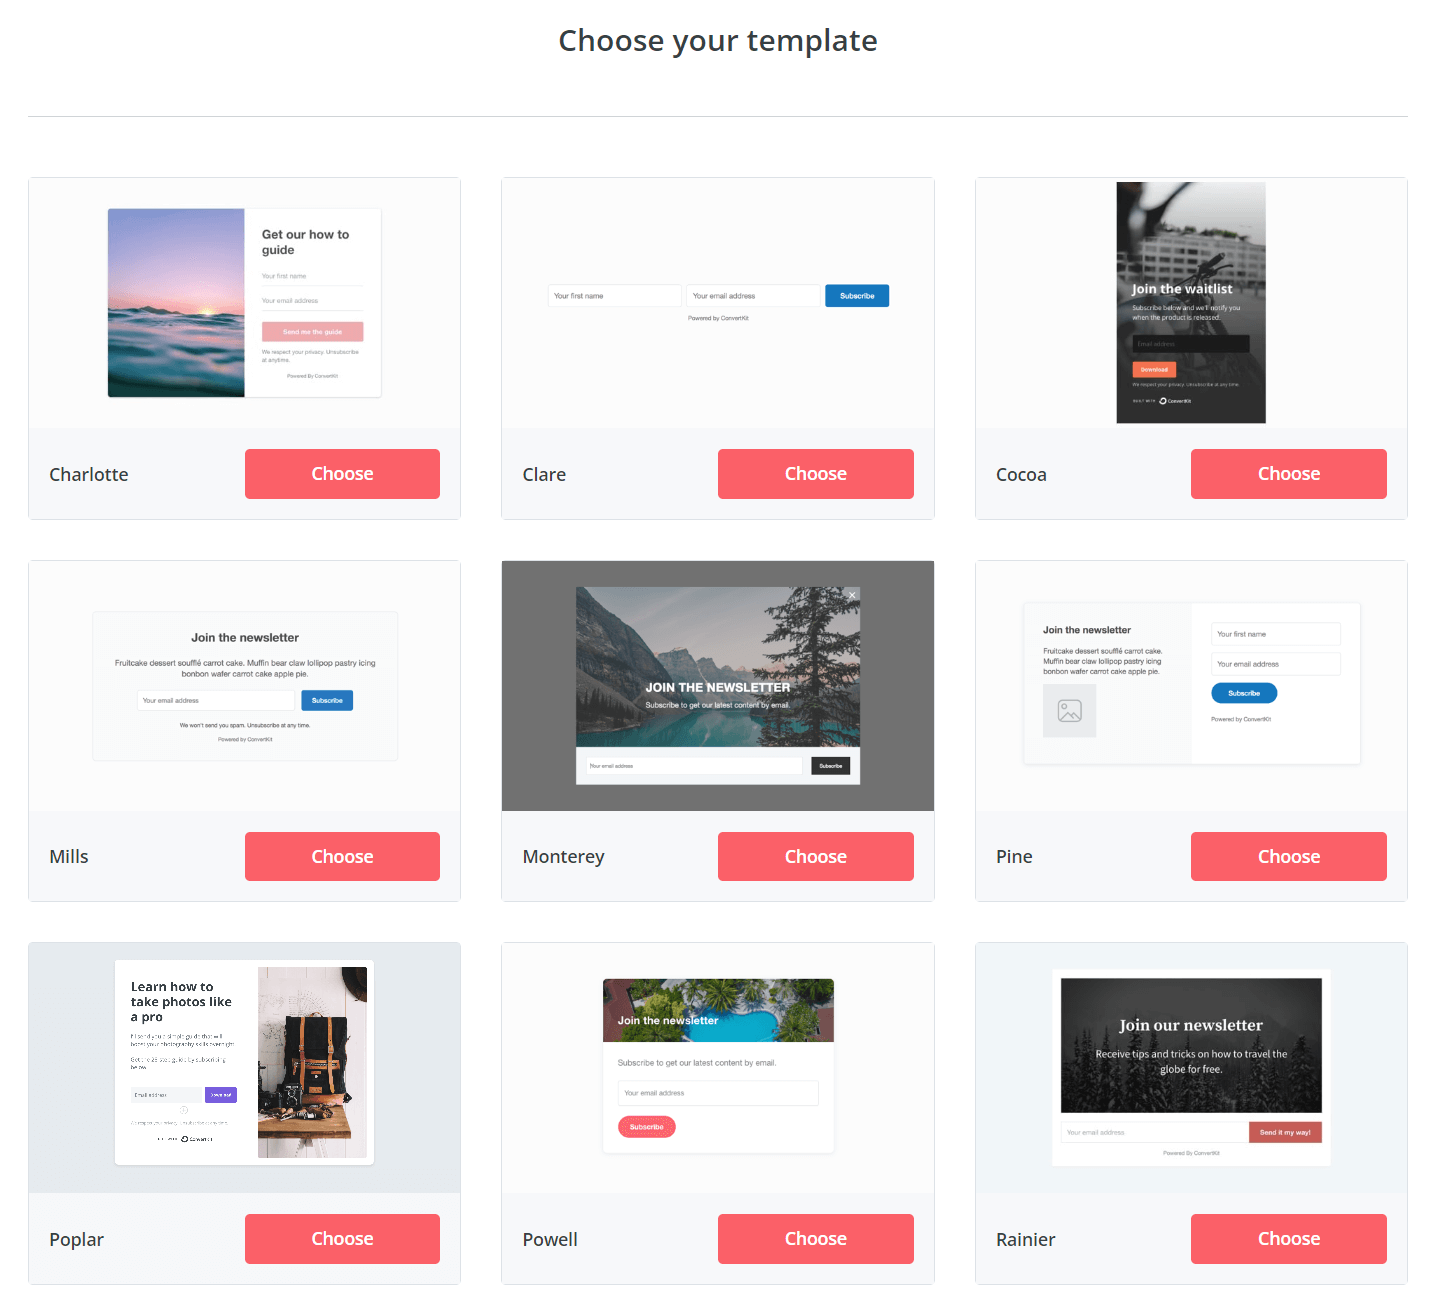
Choose the Clair template for a clean, simple form that embeds seamlessly on your site
Customize the Form
A few things worth doing while you're here:
Add a subscriber name field. Click the plus sign under the email field, select First Name from the Custom Field dropdown, and mark it as required. Move it to the left of the email field if it looks better that way.
Edit the form field. Click on Name or Email to edit the Font Color, Border Color, Border Radius and Font Weight.
Edit the button. Edit the button text first. "Subscribe" is fine, but something like Get the Freebie, Download Now, or I Want In tends to convert better and sounds more like a real person wrote it. Edit the button style to match your branding.
Remove the "Built with Kit" badge. Click on it and uncheck the checkbox. Done.
Step 2: Edit the Form Settings:
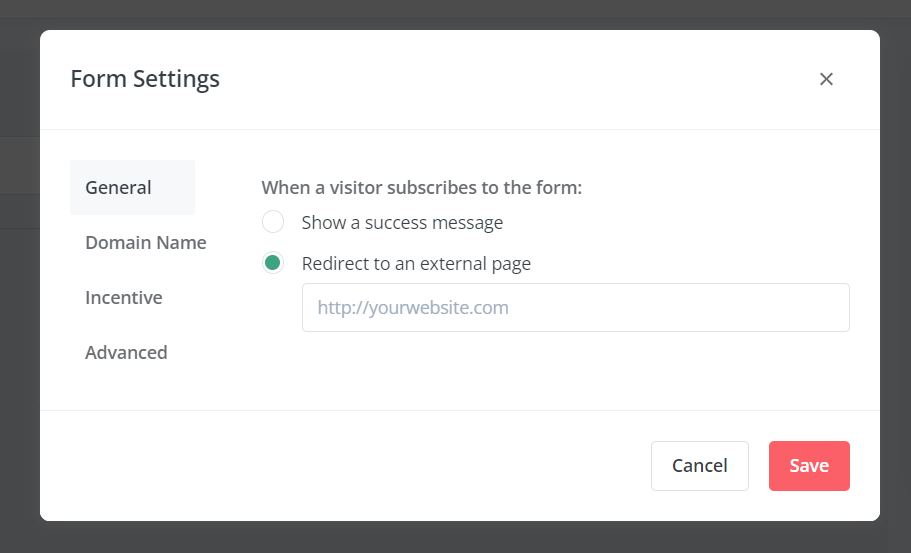
Add a Redirect URL
This is an optional but underused feature. After someone signs up, instead of showing them a generic confirmation message, you can redirect them to a custom thank you page on your website.
Your thank you page can include a welcome video, a note about what to expect from your emails, links to your best content, social links, or even a soft pitch for your services. It's a low-effort way to make a stronger first impression.
Go to Settings, then under General, select Redirect to an external page and paste your URL.
Add a redirect URL to send new subscribers to a custom thank you page
Edit the Incentive or Confirmation Email
This is the part that trips people up, so let's talk about it.
The incentive email is what Kit sends automatically after someone fills out your form. It serves two purposes: confirming their subscription (double opt-in) and delivering your lead magnet. Kit strongly recommends using the incentive email rather than turning on Auto-confirm new subscribers, and honestly, it's the right call. Double opt-in keeps your list clean and your open rates healthier.
Here's how to set it up:
Go to Settings, then Incentive, and make sure:
Send Incentive Email is checked
Auto-confirm new subscribers is unchecked
Click Edit Email Contents and rewrite it so it actually sounds like you. The default copy is... fine, but it's generic. Add a line about what they're getting, maybe a little context about what's coming next from you, and a warm welcome.
Important: Change the button text to something relevant, like Download Your Freebie or Get Your Free Guide. But leave the button URL as {{ confirm_url }}. That variable is what confirms their subscription when they click. Do not change it.

This is the default incentive email, rewrite it so it sounds like you
Attach Your Lead Magnet
Still under Settings and Incentive, look for the section that says After confirming, redirect to:
You have two options here:
URL - paste a Google Drive or Dropbox link, or a hidden URL on your website
Download - upload the file directly to Kit
Either works. If you're sharing a PDF, uploading directly to Kit is tidy. If your lead magnet is a video training or a multi-resource folder, linking to a URL makes more sense.
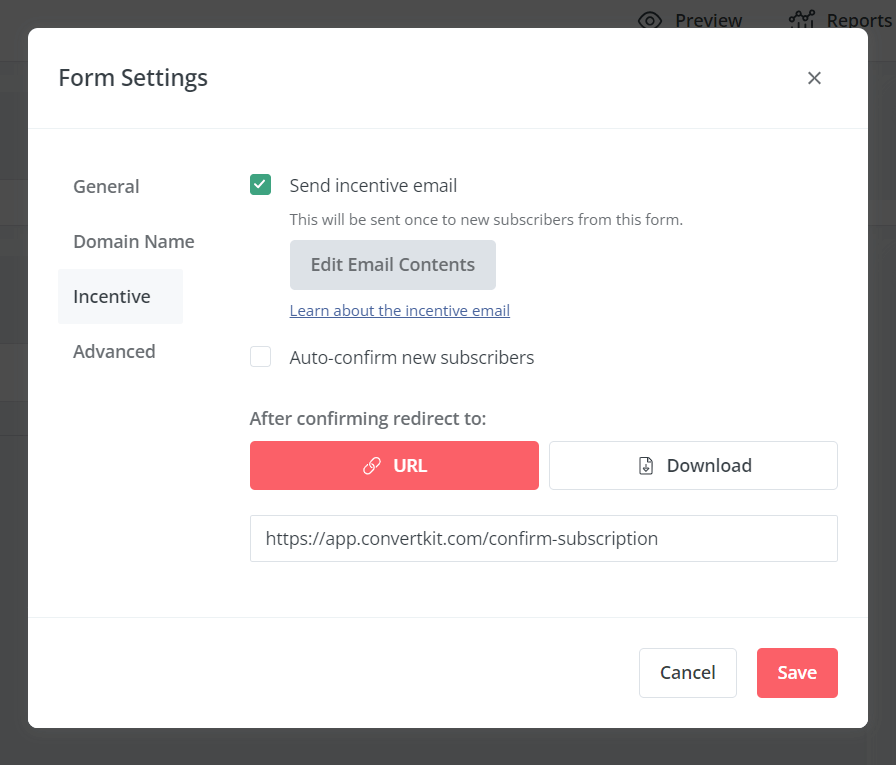
Attach your lead magnet as a file upload or URL under the Incentive settings
Step 3: Embed the Form on Your Website
Once everything is set up, go back to your form and click Publish. Copy the Javascript code (not the HTML version). Javascript plays nicer with most website builders, works on mobile, and automatically reflects any updates you make to the form without needing to re-paste the code.
In your website builder, insert a code block wherever you want the form to appear, delete any placeholder content, and paste in the Kit code.
Then: preview the page, and test everything.
Seriously, test it. Fill out the form yourself. Check that you receive the incentive email, that the button works, that the lead magnet downloads or loads correctly, and that the form looks good on both desktop and mobile. It takes five minutes and saves a lot of awkward emails from subscribers who can't access the freebie you promised them.

Copy the Javascript code and paste it into a code block on your website
FAQ
Can I deliver a lead magnet in Kit without double opt-in?
Yes, you can check Auto-confirm new subscribers if you want to skip the confirmation step. However, Kit recommends against this, and so do most email marketers. Double opt-in results in a healthier, more engaged list over time. It's worth the extra click.
What file types can I upload as a lead magnet in Kit?
Kit supports PDF uploads directly. For other file types like videos, spreadsheets, or Canva templates, you'll want to host the file on Google Drive, Dropbox, or a similar platform and use a URL link instead.
Can I use Kit's free plan to deliver a lead magnet?
Yes. Kit's free plan includes forms and the incentive email feature, so you can set up lead magnet delivery without paying anything. The free plan does have subscriber limits, so as your list grows you'll want to check whether upgrading makes sense.
What should I put on my thank you page?
Keep it simple but intentional. Thank them, let them know the freebie is on its way, and give them a clear next step. That might be following you on Instagram, booking a discovery call, watching a short welcome video, or browsing your most popular blog posts. Don't overwhelm them with options.
Can I deliver the same lead magnet to multiple forms?
Yes. If you have multiple opt-in points (different pages, different freebies), you can create separate forms and set up different incentive emails and redirect URLs for each one. They can all pull from the same lead magnet file, or point to different ones.
What happens after they download your freebie?
Setting up your lead magnet in Kit is a huge win for growing your list. But when one of those leads is ready to hire you, are your client onboarding systems ready to deliver? Take this 2-minute quiz to find out if your client experience is ready for growth.
Give Kit a Try
If you're not already using Kit, they offer a free 14-day trial of the Creator plan. Click here to get started and test out everything covered in this post.
