How to Accept Payments with Stripe and Manage Payouts Easily

Stripe lets you accept payments online through credit cards, ACH transfers (U.S. only), or connected platforms like Dubsado and Squarespace. You can customize payout schedules, use Instant Payouts for faster access to funds, send branded receipts, and issue refunds directly from your dashboard.
Choosing the right platform for accepting payments is a big part of running your business smoothly. You want something that’s easy for clients to use, doesn’t pile on hidden fees, and connects with the tools you already rely on.
Stripe has been a game-changer for businesses that want to accept payments with Stripe, access funds quickly, and simplify their online checkout process.
In this post, I’ll walk you through the key things you need to know to get started:
How to accept payments with Stripe
How to receive payouts and adjust your payout schedule
How Stripe Instant Payouts work
How to send payment receipts
How to issue refunds if needed
Let’s take a closer look at how to make your payment process smoother, faster, and easier for everyone involved.
Why Business Owners Use Stripe for Online Payments
Stripe has been my main payment processor since I started my business, and for good reason. It’s reliable, integrates with the tools I already use, and gives me peace of mind knowing my funds won’t be frozen or delayed.
Unlike some platforms with hidden fees or slow transfers, Stripe keeps the process simple: clients pay using a credit card or bank account, and funds are deposited into your account on your chosen schedule.
Here are a few reasons many business owners prefer Stripe:
It’s trusted by millions of businesses around the world.
Accepts online credit card and bank payments
No monthly fees, only transaction fees
Works with CRMs and platforms like Dubsado, Squarespace, Kajabi, and Thinkific
Flexible payout schedules and Stripe Instant Payouts for quick access to cash
Benefits of Accepting Payments with Stripe
Here’s what makes payment with Stripe a strong option for service providers:
Clients Can Use Credit Cards
Most people use credit cards to make online purchases. It’s fast, familiar, and often gives them points or cashback. By using Stripe, you’re giving clients a smooth and trusted way to pay. They don’t need to remember a password or log into another account. They can just fill out the payment form and click submit.
ACH Transfers (U.S. Only)
If your clients are located in the United States, they can also pay by ACH (Automated Clearing House). ACH is an electronic bank-to-bank payment only available to users of certain US banks. It works well for large amounts, is secure and often has lower fees than credit card payments, but it’s only available to people with U.S. bank accounts.
Works with Other Platforms
Stripe integrates with popular systems like:
Dubsado: Once connected, your clients can pay your invoices by clicking a Pay Now button.
Squarespace: If you sell services or digital products, Stripe lets your clients check out right from your site.
Kajabi: Coaches and course creators can use Stripe to process course or membership payments.
No matter which platform you use, Stripe makes the payment part feel easy and professional.
You Can Offer Autopay
If you offer payment plans in Dubsado and use Stripe as your payment processor, you can turn on the autopay function. This allows for automatic payments on the due dates of your payment plan. Clients don’t need to log in or remember to pay their invoice. Stripe just charges their card on schedule.
This helps you get paid on time and spend less time chasing invoices.
There Are No Monthly Fees
Stripe doesn’t charge a setup fee or monthly subscription. You only pay when a payment is processed. The fee depends on your country. In Canada, for example, Stripe currently charges 2.9% plus 30 cents for each successful card payment.
While you may want to compare fees across platforms, keep in mind that the time savings and ease of use that come with Stripe are worth a lot too.
To review the details of Stripe’s processing fees visit their site.
How to Set Up Your Stripe Account
Getting started with Stripe is simple - even if you’re not super comfortable with tech.. Follow these steps to sign up for a Stripe account:
Visit the Stripe Website: Head to the official Stripe website and click Start Now to begin.
Create Your Account: Fill in the required information, including your email address, full name, country and password and click Create Account.
Verify Your Email: Stripe will send you an email. Click the link to verify.
Provide Additional Information: Add any required details to verify your identity and any additional business information.
Connect your Bank Account: This allows Stripe to deposit payments from Stripe into your bank automatically.
Two-Step Authentication: Enable two-step authentication to keep your Stripe account secure. You can choose SMS or an authenticator app.

Sign up for a Stripe account at www.stripe.com
How to Set Up a Payout Schedule in Stripe
After your account is ready, you’ll want to choose how often you receive payouts. A payout schedule determines how often Stripe transfers your earnings to your bank account.
In most countries, Stripe defaults to daily payouts. But you can change this to weekly, monthly, or even manual if you prefer.
Here’s how to set it up a payout schedule:
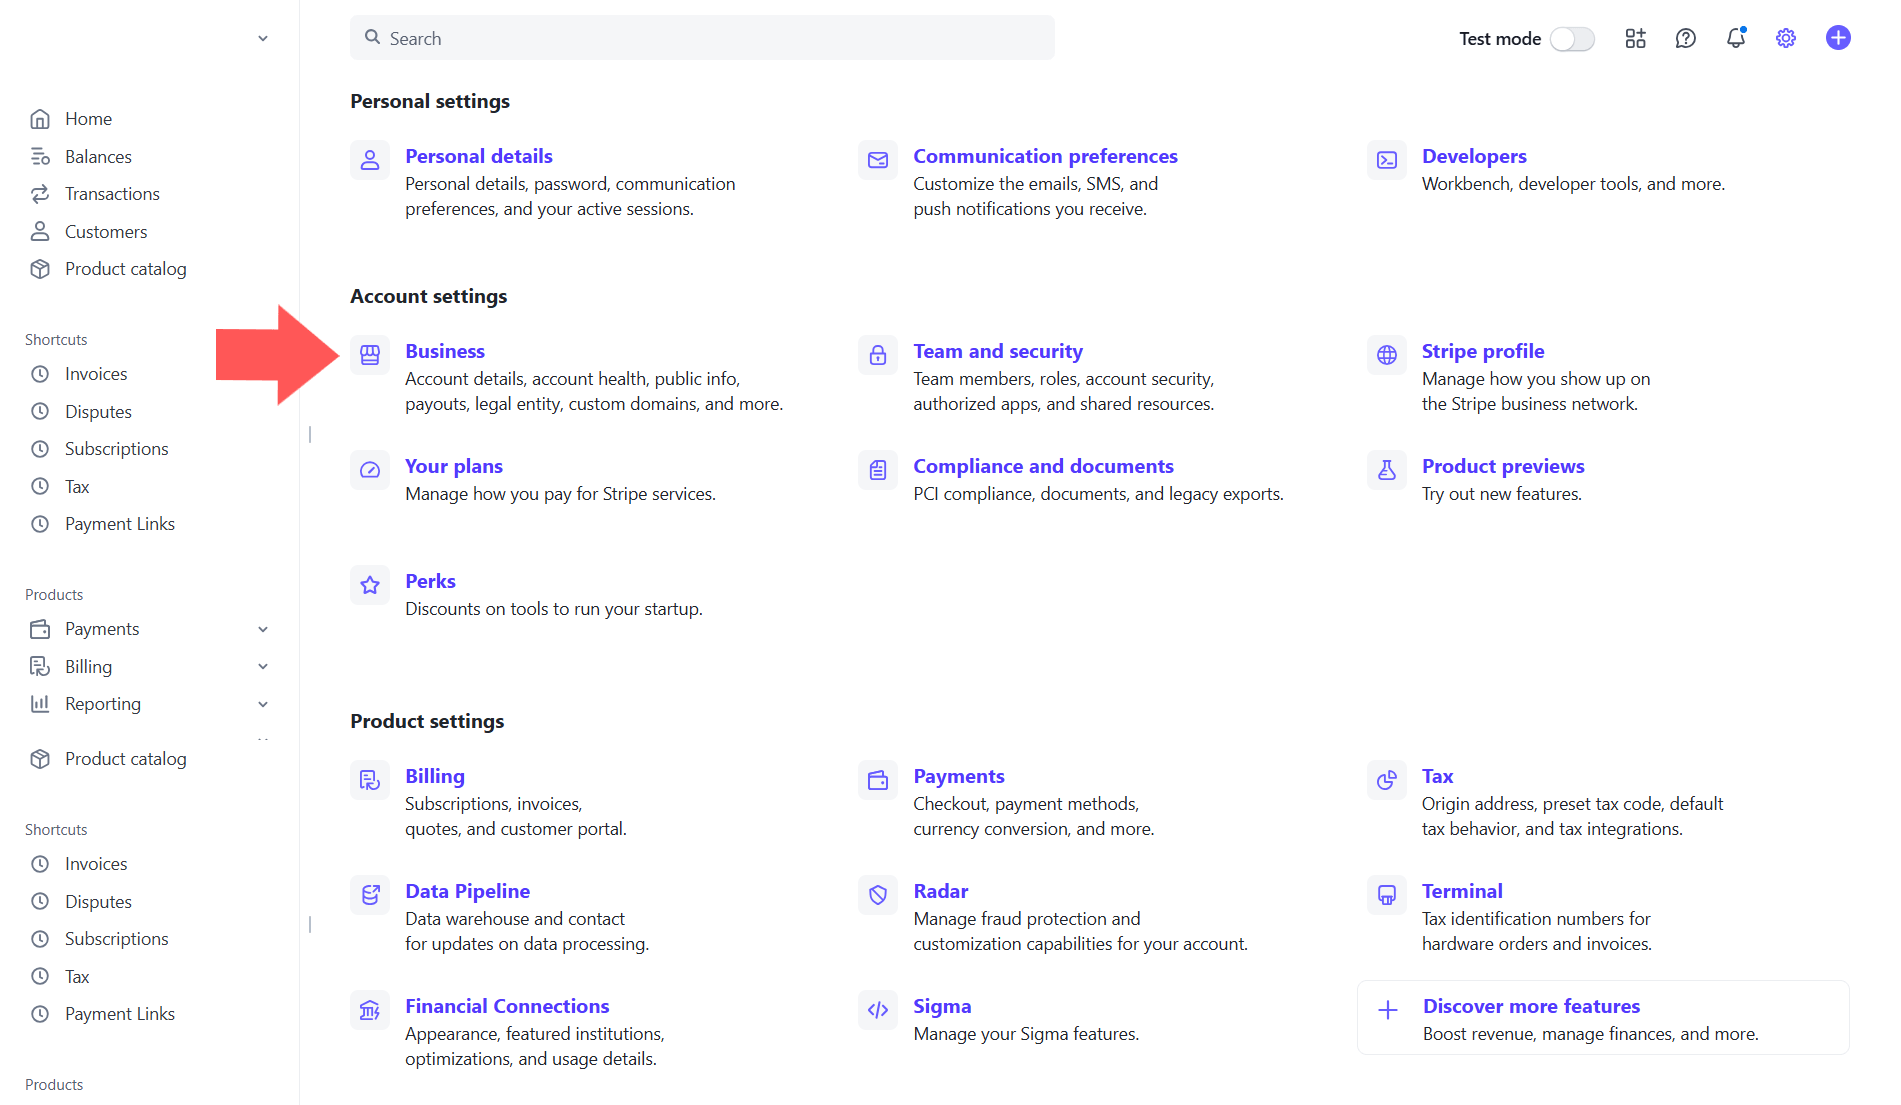
In your Stripe Dashboard, click the Settings icon (gear icon at the top right).
Scroll to Business (under Account settings).
Click on the tab called External payout accounts and scheduling.
Go to ‘Settings’ → ‘Business’ → Click ‘External payout accounts and scheduling’
4. In the Payout Schedule section, choose the option that works best for your business. You can choose daily, weekly, or monthly payouts, or switch to manual payouts, depending on your business model and cash flow requirements.
5. Click Save to confirm.
Payout Speed
Depending on your location, industry, and how long you’ve had your Stripe account, you might be eligible for faster payout speeds.
You’ll see options like:
Standard payout speed: Funds are available 7 calendar days after the payment.
Accelerated payout speed: Funds are available 3 business days after the payment.
Not everyone qualifies for accelerated payouts, but if you see the option, you can select it and click Save to update.

Set your payout schedule and payout speed in Stripe
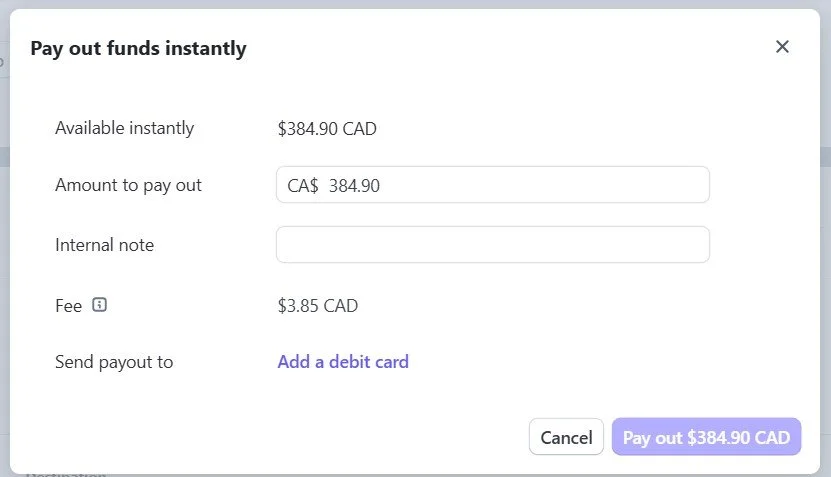
How to Use Stripe Instant Payouts
Need funds right away? Stripe Instant Payouts transfer money to your bank or debit card within 30 minutes for a 1 to 1.5% fee.
Currently available to users in: Australia, Canada, New Zealand, Norway, Singapore, the United Kingdom, United States and all EU countries. You can see an updated list of eligible countries here.
Keep in mind that not all Stripe users are eligible for Instant Payouts. If your account is new or doesn’t meet certain requirements, you might not see this option yet.
How to access Instant Payouts:
In your Stripe Dashboard, click on Balances in the left-hand menu.
Under Payouts, click Pay out now (this will only appear if funds are available).
When the pop-up appears, enter the amount you want to pay out instantly.
Link the debit card or bank account where you want the money to go.
Click Pay Out to finish. Stripe will verify your card, and the funds should arrive within half an hour.
If you need quick access to payments from Stripe, Stripe Instant Payouts is a great option to have in your back pocket.
Using Stripe Instant Payout
How to Send Receipts via Stripe
Receipts build trust and reassure clients that their payment went through. Stripe can automatically send them for you.
Here’s how to set it up:
In your Stripe Dashboard, click the Settings icon (gear icon at the top right).
Scroll to Business (under Account settings).
Click on the tab called Customer emails.
Toggle on Successful payments to send receipts automatically.
You can also toggle on Refunds if you’d like to notify clients when money is sent back to them.
⚠️ IF YOU USE DUBSADO: Dubsado now automatically sends receipts for any payment processed through Stripe. If you’re using Dubsado for invoicing, it’s best to leave the Stripe receipt setting turned off so your clients don’t receive two emails for the same payment.

Enable emails receipts in Stripe
How to Customize Stripe Receipts
Customize your email receipts by adding your logo and brand colors. This makes things feel more professional and aligned with your business.
Here’s how to customize your receipts in Stripe:
In your Stripe Dashboard, go to Settings (gear icon at the top right).
Scroll to Business (under Account settings).
Click on the tab called Branding.
Upload your logo and icon, and choose your brand colors.
On the right-hand side, you’ll see a preview of the receipt and also of checkout links, invoices, etc. Adjust until it looks right.
Hover over the email receipt to see the option Send test receipt. Send yourself a test receipt to see how it will appear to clients.
This small touch helps your brand stay consistent and shows clients that you’ve taken the time to create a smooth, thoughtful experience.

Customize Stripe receipts
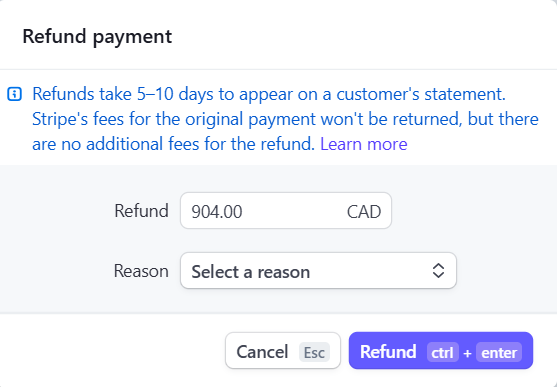
How to Process Refunds in Stripe
Refunds are simple to issue from the dashboard:
In your Stripe Dashboard, go to the Payments page on the left side.
Find the payment you want to refund.
Click the three dots ··· next to the payment, then choose Refund Payment.
Stripe defaults to a full refund. If you want to refund part of the payment, just enter a different amount.
Choose a reason for the refund. If you select Other, you’ll need to write a quick note explaining why.
Submit the refund.
Important: Refunds come out of your available Stripe balance. If you don’t have enough money in your Stripe account to cover the refund, Stripe will pull the difference from your linked bank account. Make sure you have a sufficient balance in your account. Just something to be aware of before clicking the refund button.
Process refunds in Stripe
Ready to Take Your Business to the Next Level?
If you’re already using Stripe or planning to, pairing it with a strong CRM like Dubsado can make the entire client experience feel smoother from the first inquiry to the final payment.
Dubsado takes care of everything from inquiries to onboarding to offboarding. And when Stripe is connected, clients can book and pay in one simple step.
If you're ready to get Dubsado set up for your business, I can help.
📅 Book a free discovery call to learn how a custom Dubsado setup can help you get paid faster, spend less time on admin, and create a better experience for your clients.
Let’s make sure your systems are working for you behind the scenes.