Dubsado Canned Emails: How to Create & Send Them
Canned emails are one of the biggest time-saving features in Dubsado. Instead of writing the same email from scratch every time, you build your templates once and let Dubsado send them automatically through workflows, or pull them up manually when you need them.
It does take some time upfront to map out your client process and figure out which emails you're sending repeatedly, but once they're built and attached to your workflows, it's a great feeling knowing it's all taken care of.
In this post I'll walk you through how to create canned emails in Dubsado, how to send them, and share some tips to make the whole process easier.
Note: Steps shown are in Dubsado 2.0. Core concepts apply in 3.0 but the interface looks slightly different.
What are canned emails?
Canned emails are email templates you can use in client projects and send automatically through workflows or manually from inside a project.
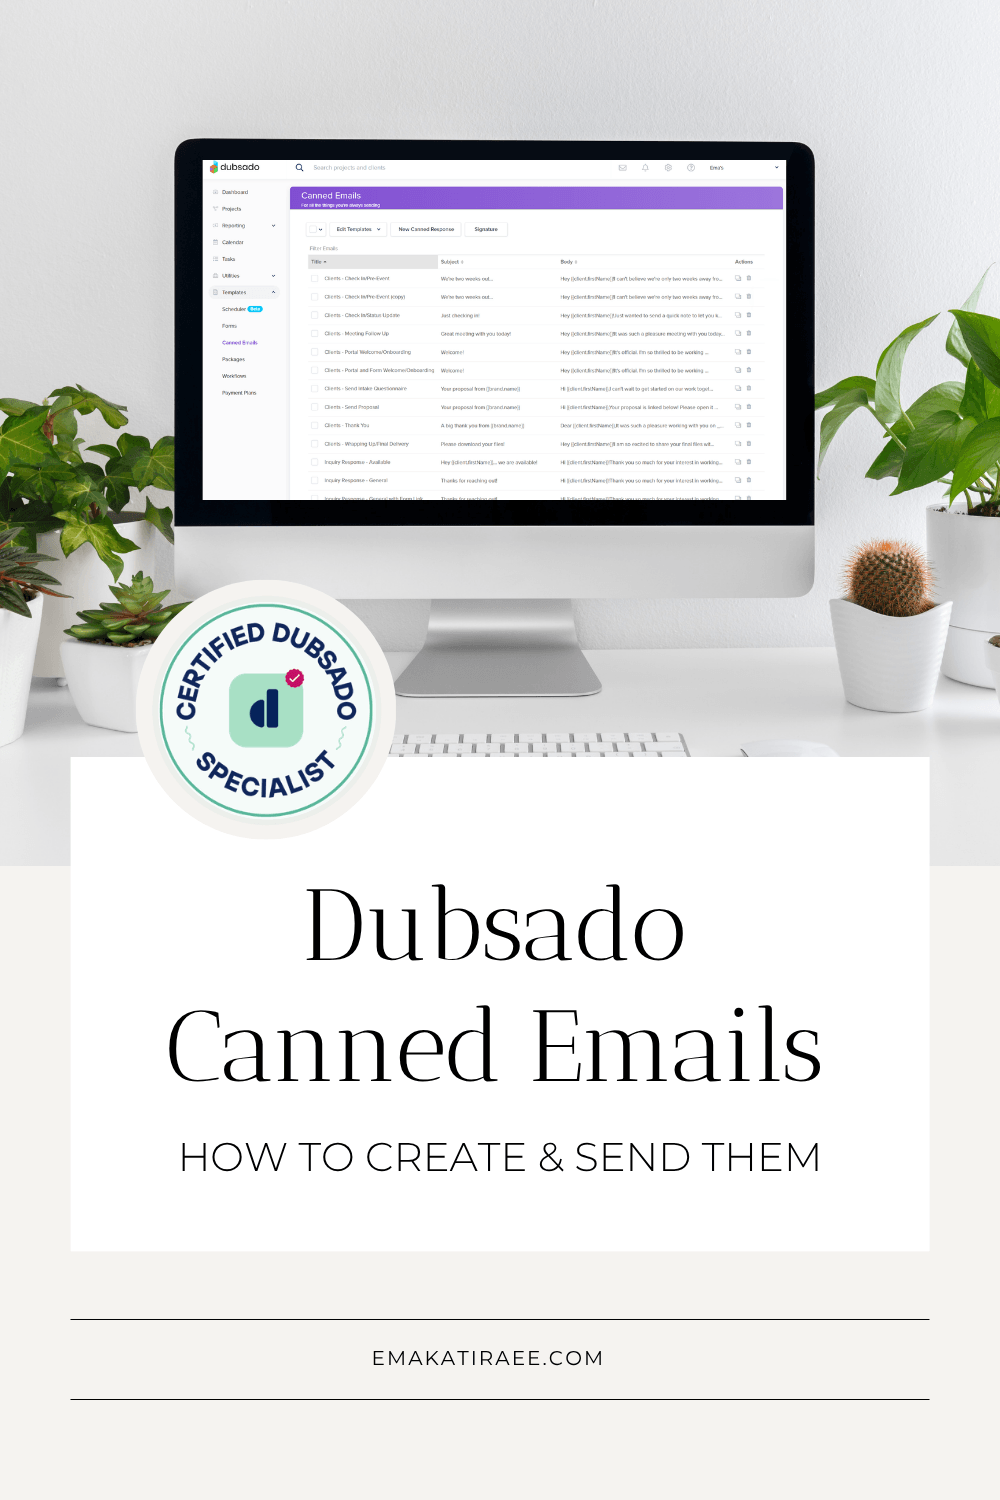
Your Dubsado account comes with some preloaded canned emails in the following categories:
Client emails
Inquiry emails
Payment Reminders - due today, past due and upcoming payment
Scheduler email - reminder and invitation
How to Edit the Default Canned Email Templates
Under Edit Templates you'll find Dubsado's default canned email templates. These can be edited to match your business and voice.
Some of these emails send automatically under certain circumstances, like when a contract is completed, so keep in mind that they need to work across all your services:
Send Invoice
Send Contract
Contract Completed
Send Form
Send Portal
Send Scheduler / Scheduler Group
Appointment Confirmed
Appointment Rescheduled
Appointment Canceled
Form Reminder
Send Refund
Payment Plan Reminder
Autopay Failed
Autopay Canceled
Autopay Enrollment Confirmation

Default Canned Emails in Dubsado
How to Create a New Canned Email
There are two ways to create a new canned email template:
Duplicate an existing email: Find an email in your account that's close to what you need, duplicate it, and edit the title, subject line, and content.
Create one from scratch: Click New Canned Response at the top of your email list, give it a title, add a subject line, and write the content.
How to Send a Canned Email
Via a workflow
Inside the workflow you want to edit, click Add Action and choose Send Email from the list of actions.
Set the timing for when the email should go out, based on a fixed date or a relative trigger like "after workflow started" or "before project start date."
Then choose your canned email from the Email to send dropdown. The subject line and body will populate automatically.
Tip: You can edit the email content directly inside the workflow step without changing the original template. The edits only apply to that workflow.
Important: If you update a canned email template after it's already been added to a workflow, the workflow will not automatically update. You'll need to go into the workflow, reselect the template, and save the step again.

Send a canned email via workflow
Manually from a project
Inside the project, go to the Emails tab and click Send Email
When the compose box opens, click the bookmark icon and select the canned email you want to use
Edit the content as needed for that specific client. It won't change the original template.
What Are Smart Fields and How Do I Use Them?
A smart field is a placeholder that Dubsado replaces automatically with real information, like your client's name, their project start date, or the amount remaining on their invoice.
To add a smart field to an email, click Smart Field at the bottom of the email editor and choose from the list.
Dubsado has a smart field reference guide that I refer to constantly when writing emails for clients.
A couple of useful examples:
Project start date: {{job.start | mediumDate}}
Invoice remainder: {{job.invoice | remainder}}
Just make sure the information a smart field is pulling from has actually been collected or added to the project before the email goes out, otherwise the field will either be blank or show an error.

Smart fields in Dubsado emails
How to Include Forms or Schedulers in a Canned Email
Via a workflow
Inside the workflow, click Add Action and choose Send Form or Send Appointment Scheduler.
Set the timing, choose the form or scheduler template, and then select the canned email to send it with.
If you're sending a form, your email template needs to include the smart field {{form | formLink}}

Send a form in a canned email via workflow
If you're sending a scheduler, your email template needs to include the smart field {{scheduler | schedulerLink}}

Send a scheduler in a canned email via workflow
Manually from a project
Go to the Forms tab inside the project → click Add New Form → select the form from the dropdown.
The form will appear and you can edit it for that specific project before adding it. Click Add, then Send.

Select a form
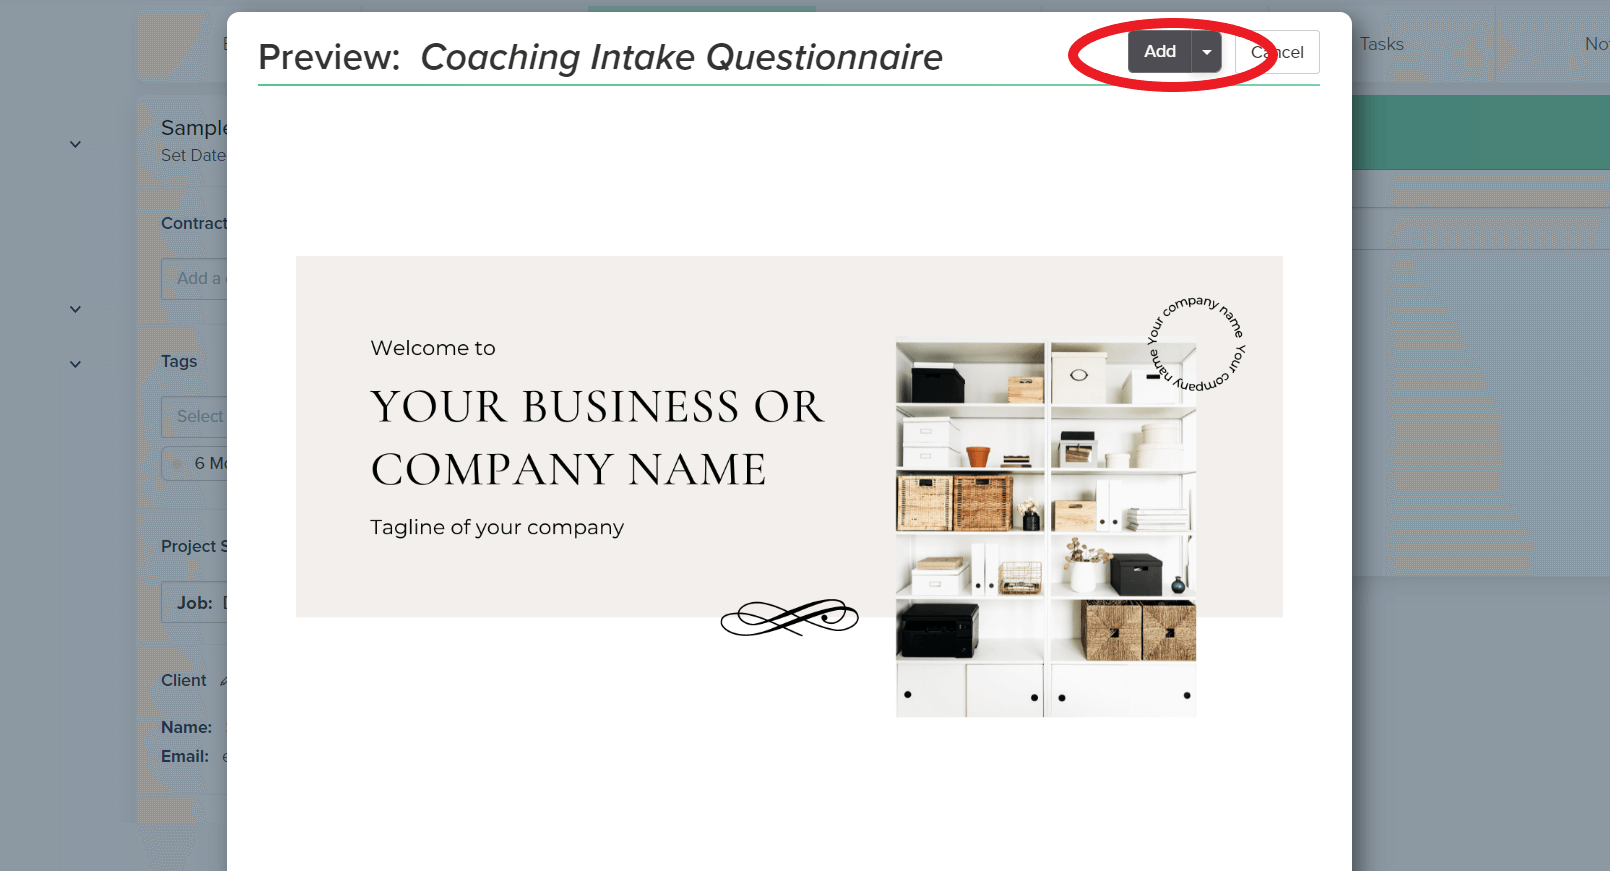
Add a form to your project
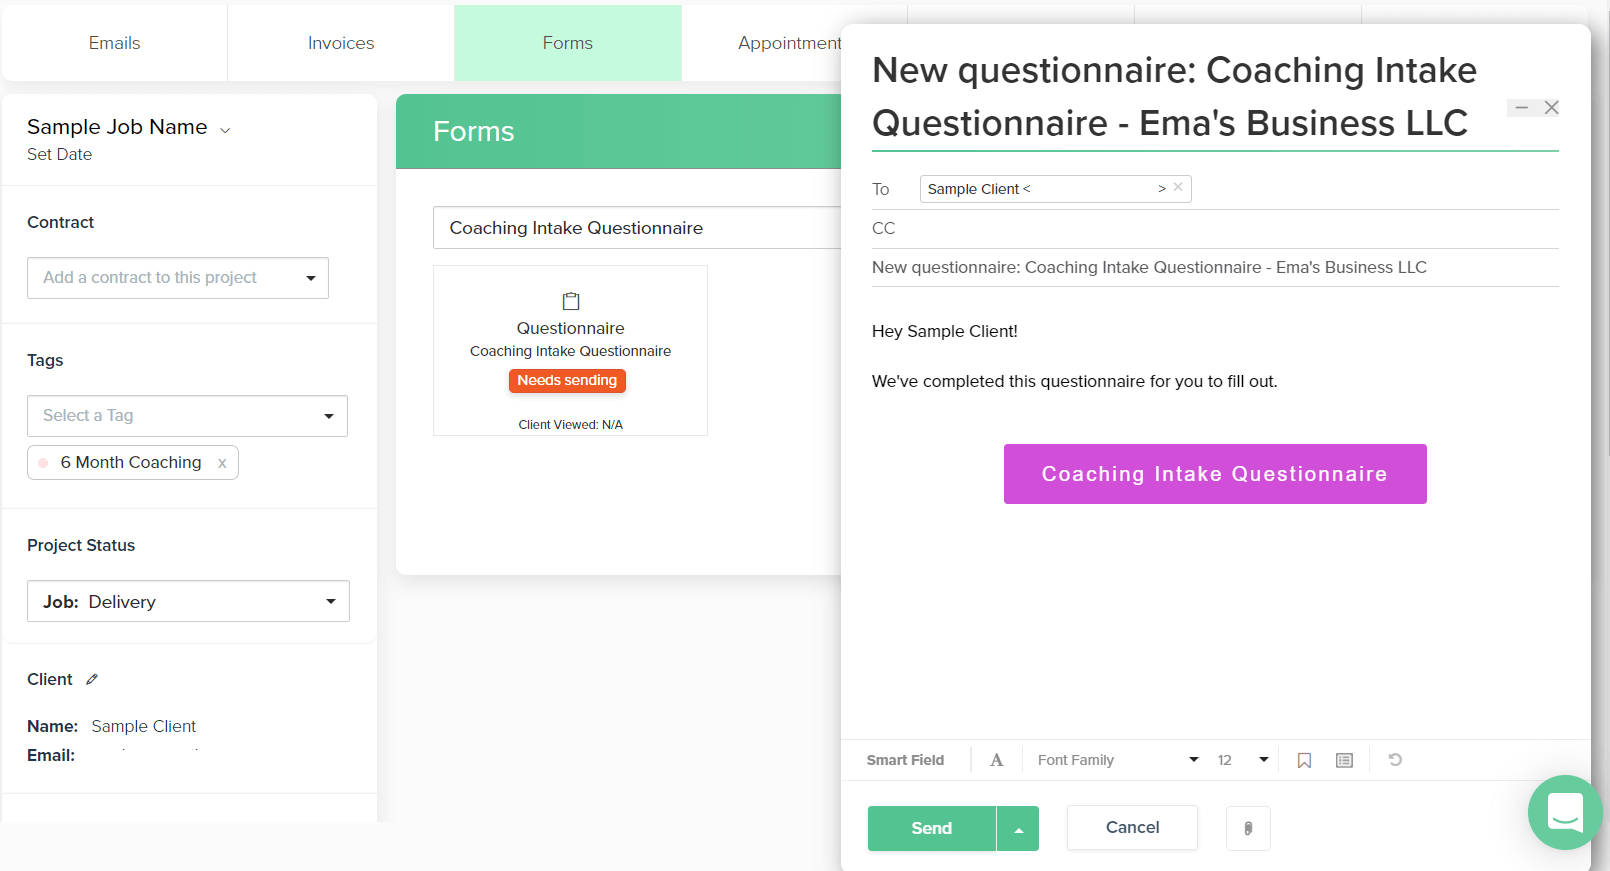
Send the form manually
The compose box will open with the default Send Form email. To swap it for one of your own canned emails, click the bookmark icon and select from your list.
If your email includes the {{form | formLink}} smart field, it will automatically become a button with the form name on it.
How to Attach a PDF to an Email
You can't attach a PDF to a canned email template, but you can attach one to a manually sent email from inside a project. Go to the Emails tab, click Send Email, and use the paperclip icon to attach the file.
If you have a file you send to every client, like a welcome packet, a better approach is to link to it rather than attach it. A few options:
Google Drive: Upload the PDF and use the public share link in your email. You can replace the file with an updated version and the link stays the same.
Google Doc: Change the end of the sharing link from edit?usp=sharing to copy and anyone who opens it will get their own copy. Always reflects the most current version.
Canva: If the file lives in Canva, use the preview link directly in your canned email.
How to Edit Your Email Signature
Check out my post Create an Email Signature in Dubsado for a full walkthrough.
How to Connect Your Email Address to Dubsado
Go to Settings → Emails and follow Dubsado's instructions for your email provider:
Once connected, emails you send from Dubsado will appear in your Sent folder, and replies from clients will show up in both Dubsado and your inbox.
One thing to keep in mind: if you reply to a client directly from your email inbox rather than from inside Dubsado, their subsequent replies will no longer appear in Dubsado.
Tutorial Video
In this video I walk through everything covered in this post, including how to create canned emails, send them via workflows and manually, and use smart fields effectively.
Need help setting up Dubsado?
If you've got your canned emails built but your workflows still aren't running the way you want them to, it might be worth having someone take a proper look. Find out what a done-for-you Dubsado setup actually involves, or if you're ready to talk through your specific situation, book a discovery call and we can figure out what makes sense for you.
