Dubsado Form Builder: Build Beautiful Forms Without Code
Last Updated December 2025 | By Ema Katiraee, Certified Dubsado Specialist
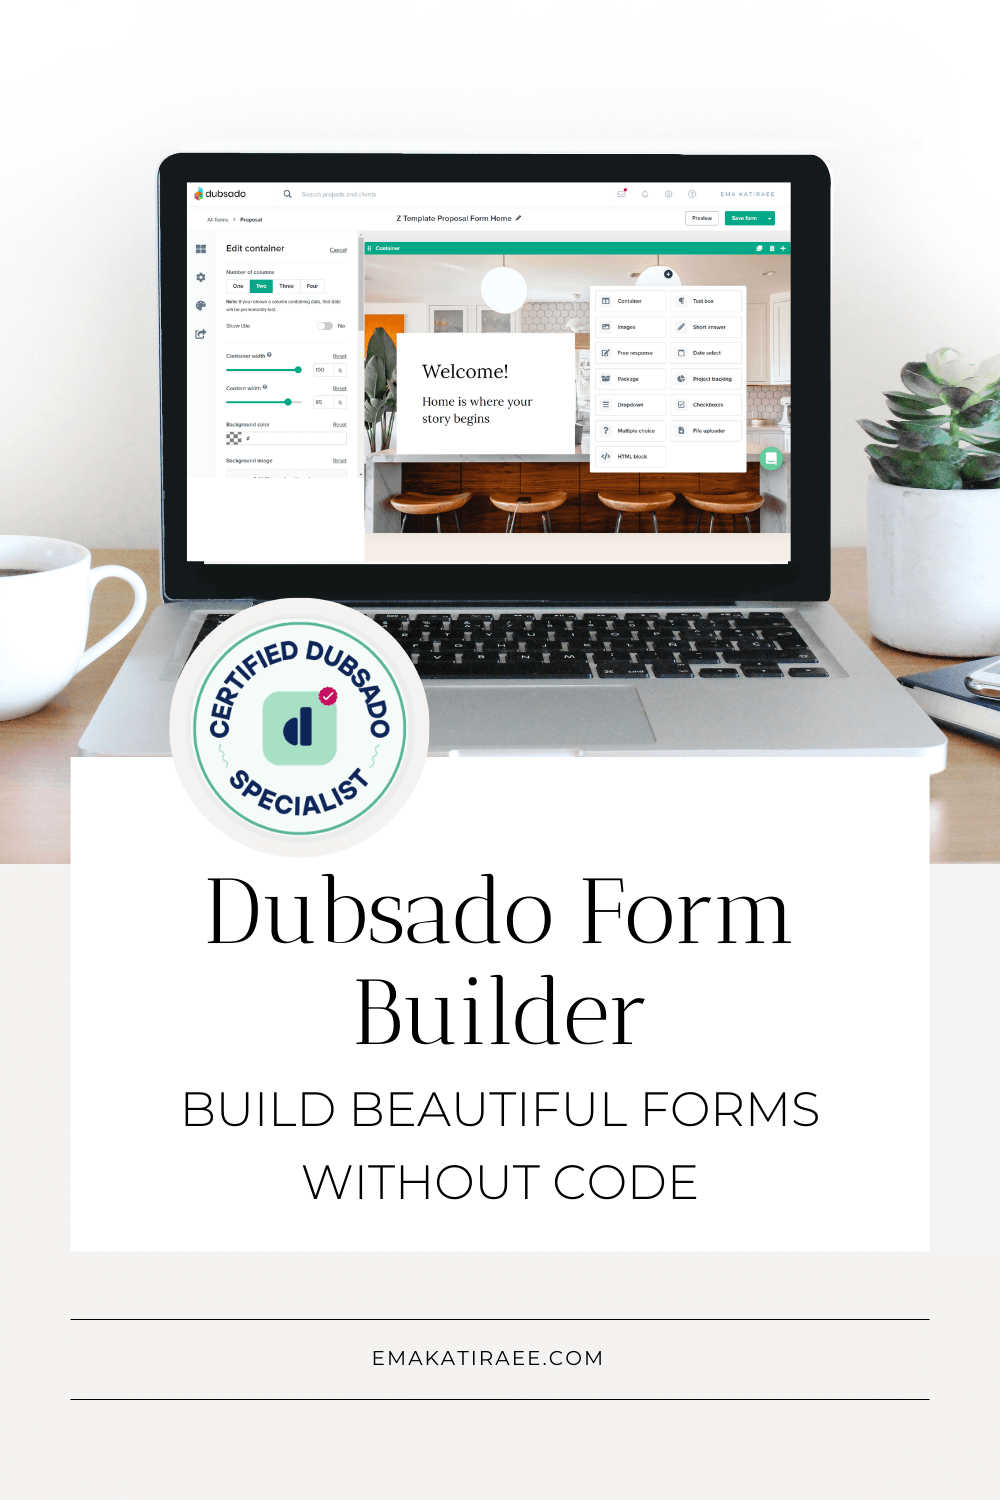
One of the things I hear most from people who are new to Dubsado is that they didn't realize their forms could look this good. And honestly, that's the form builder doing its job.
Dubsado's form builder lets you create proposals, contracts, questionnaires, and lead capture forms that look like they were built in a proper website builder - not in a CRM. Full-width images, background colors, nested containers, custom CSS if you want it. It's genuinely flexible, and you don't need to know a single line of code to get great results.
This post walks you through how the form builder works, what all the settings do, and a few things worth knowing before you dive in.
Disclosure: This post contains affiliate links, which means I may earn a commission if you click through and make a purchase. This comes at no additional cost to you.
If you're new to Dubsado, start here first: what Dubsado is and how it works for service-based businesses.
Take a look at these two pages side by side. One is a website template I built in Squarespace and the other is a Dubsado form template.

A full proposal built in Dubsado's form builder

A Squarespace website template - hard to tell the difference, right?
Can you tell which is which? The left one is Dubsado, the right one is Squarespace.
That's what the form builder is capable of.
Features of Dubsado’s Form Builder
Containers
Containers are the building blocks of your form layout. Each container can have 1 to 4 columns, and you can nest containers inside each other to create more complex layouts.
Here's what you can customize on each container:
Number of columns: choose 1 to 4. You can also toggle on a title for the container.
Container width: controls how wide the container is on the page. At 100% it spans the full screen width.
Content width: controls how wide your content sits inside the container.
Background color: set using the color picker or a hex code.
Text color: set the text color inside the container using the color picker or a hex code.
Background image: add an image as the container background. Dubsado recommends images wider than 2500 px for best results. Gifs work here too, which is a fun way to add some movement to your forms.
Before uploading any images to your containers, run them through a free compression tool like TinyJPG first. Large image files can slow down how quickly your form loads, which isn't the first impression you want to make.
If you're uploading a background image, resize it to around 2500px wide using BIRME before compressing - there's no benefit to uploading a 4000px image when Dubsado doesn't need it that large.Background image opacity: lower this to let the background color show through the image. Useful when you have text sitting on top of a background image and need it to be readable.
Padding: adds space inside the container so your content isn't flush against the edges.
Margins: adds space outside the container.
Even if your form is a single column, I'd still recommend placing everything inside containers. It makes it much easier to move sections around, duplicate content, and apply background styling.
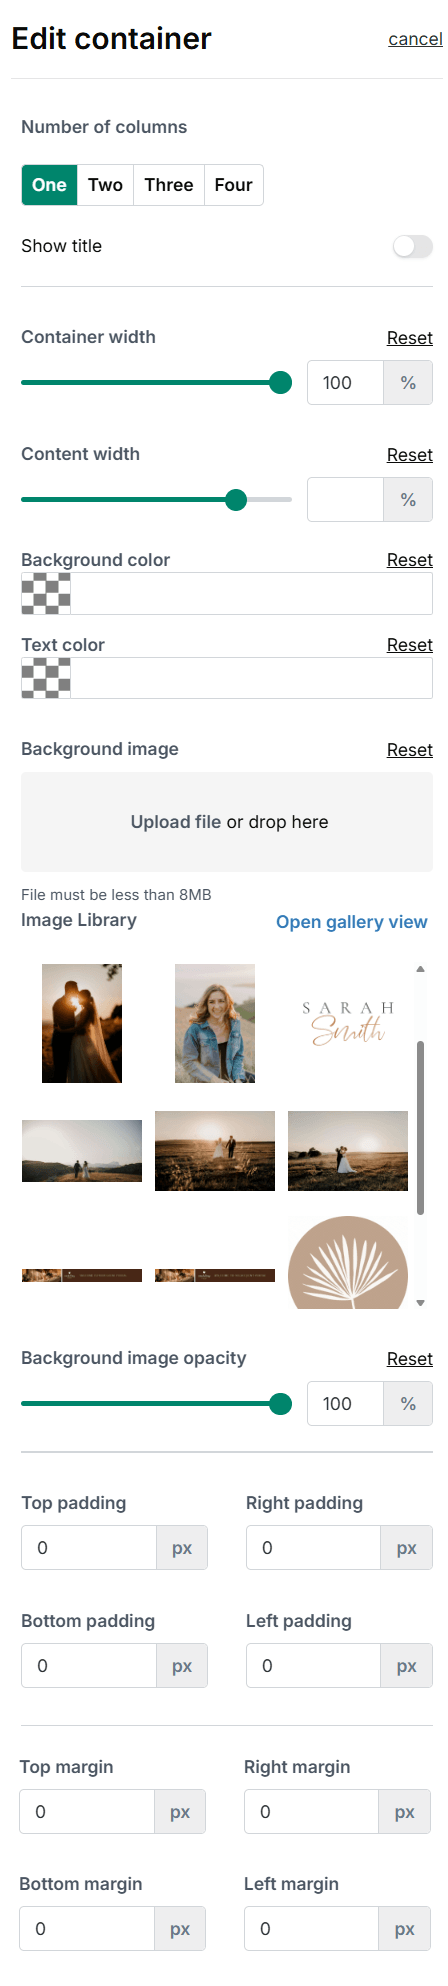
Container settings in the Dubsado form builder
Containers with background image AND background color
You can combine a background image with a background color on the same container. Set the image opacity low - around 5% - and the color shows through while the image adds a subtle texture. It's a small detail that makes a big difference visually.

A container with both a background color and a background image at low opacity
Containers inside of containers
This is where things get interesting. You can place a container inside another container to create layouts that look like proper website sections.
For example: a 3-column outer container with a beige background, and inside each column, a nested single-column container with a white background and padding. Add an icon and some text inside each, and you've got a clean "process" or "features" section that looks nothing like a typical form.

A three-column section built using nested containers - no CSS needed
Full-Width Images
Full-width images are one of the best things about the form builder. Before, achieving this required CSS code. Now you just set your container width to 100% and add your image as a background or as an element inside the container.
A container with a full-width background image and text overlaid on one side is a great way to build a header section that looks like a website hero. It's the kind of thing that makes clients do a double take when they open your proposal.
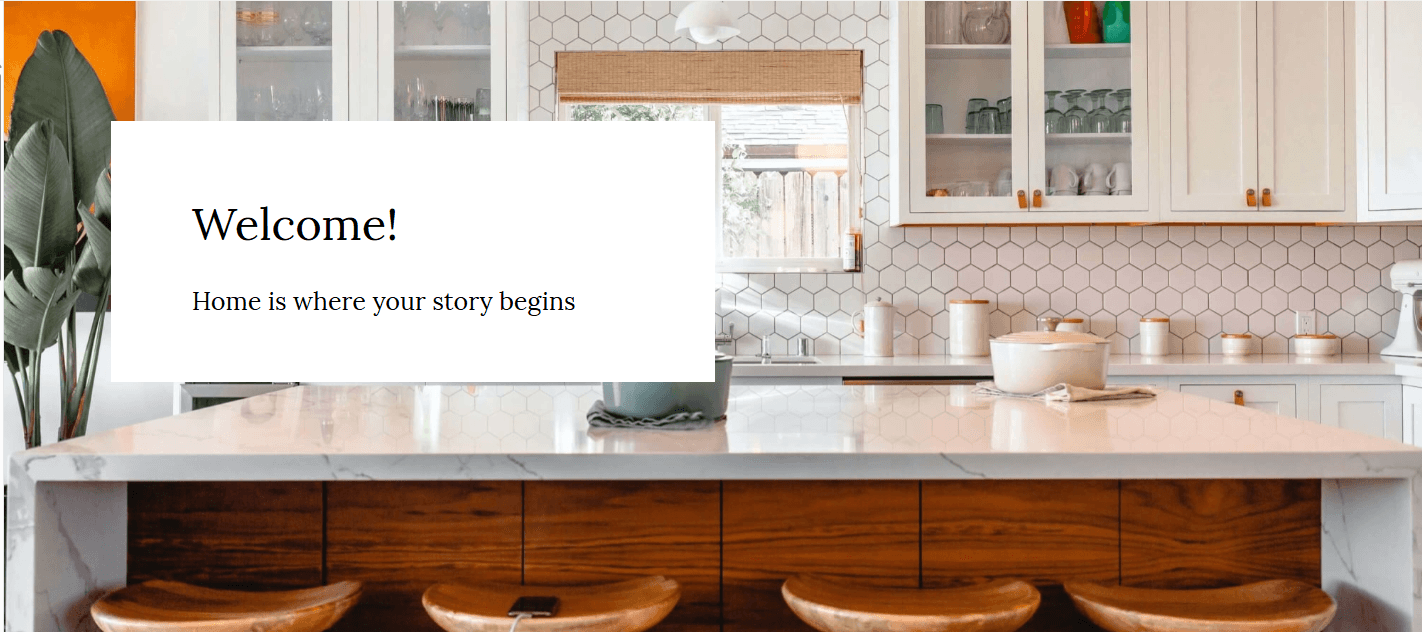
A full-width container with a background image and text overlay - mimicking a website hero section
Adding elements
You can add elements to your form in a couple of ways:
Drag and drop from the element library on the left-hand side
Hover over any existing element and click the plus sign to add something directly below it
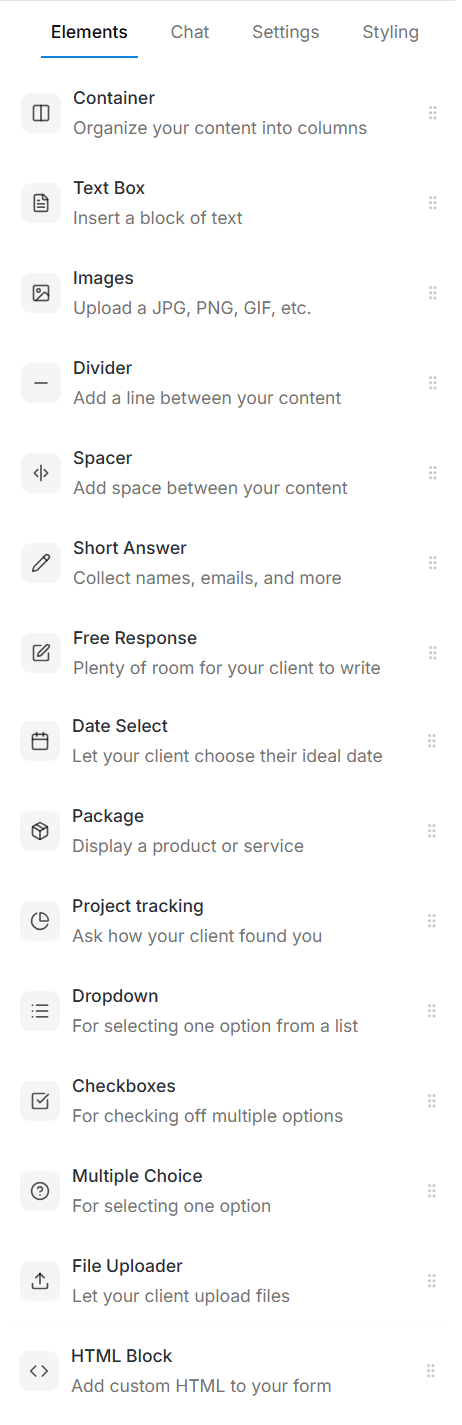
The available elements are: container, text box, images, short answer, free response, date select, package, project tracking, dropdown, checkboxes, multiple choice, file uploader, and HTML block.
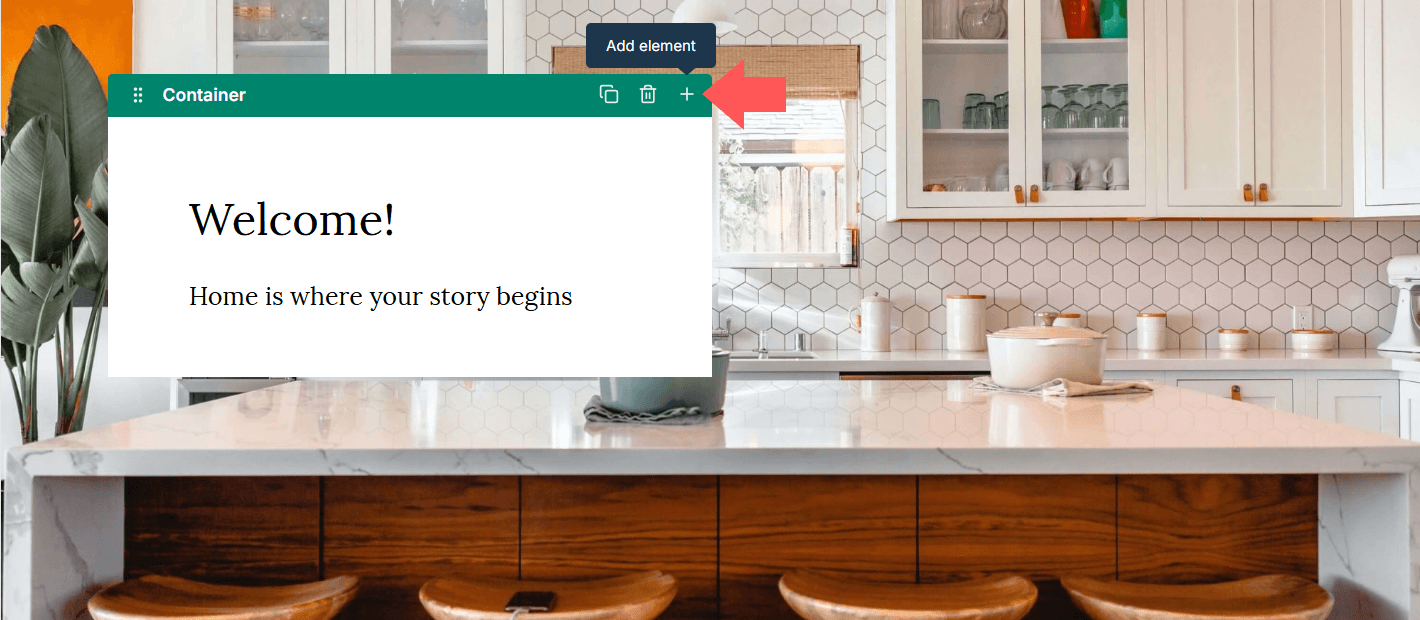
Click the plus sign to add an element directly inside your form
Inline Text Editing
Double-click any text element - including questions and package names - to edit it directly in the form. Click the checkmark at the top left of the element or click elsewhere to save. Clicking on any element also opens its settings in the left-hand panel, which saves a lot of back and forth.
If you want more custom graphic elements than a background color or single image can provide, some people still design assets in Canva and upload them here: see how that works.
Dubsado’s Form Builder Settings and Menus
All settings live in the left-hand navigation panel. Here's a breakdown of each tab:
Element Library
Where you drag elements from to add them to your form:
Container
Text box
Images
Divider
Spacer
Short answer
Free response
Date select
Package
Project tracking
Dropdown
Checkboxes
Multiple choice
File uploader
HTML block
The full element library in the Dubsado form builder
Chat
Use the chat sidebar to describe any changes you'd like to make to your form, things like "move the question about goals above the budget question" or "make the welcome message warmer," and watch the form update in real time. You can also upload a PDF that references the changes you want, and Dubsado will apply them accordingly. The affected elements highlight as they change, so it's easy to see exactly what got edited.
This works on any existing form, so even ones you built the old way, without the newer creation tools, can still be edited through chat instead of clicking through the builder manually.
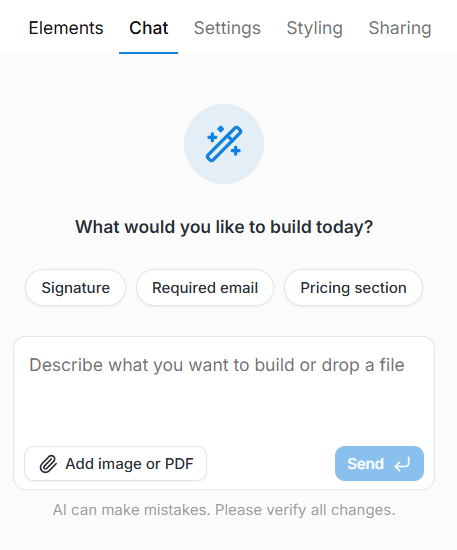
Dubsado’s chat to edit feature
Form Settings
This is where you manage the functional settings for your form. For proposals specifically, this is where you:
Attach a contract and invoice to create a 3-in-1 proposal
Allow clients to select multiple packages or apply discounts
Toggle on the public proposal option and configure workflow, redirect URL, project status, and project title
Set expiration dates
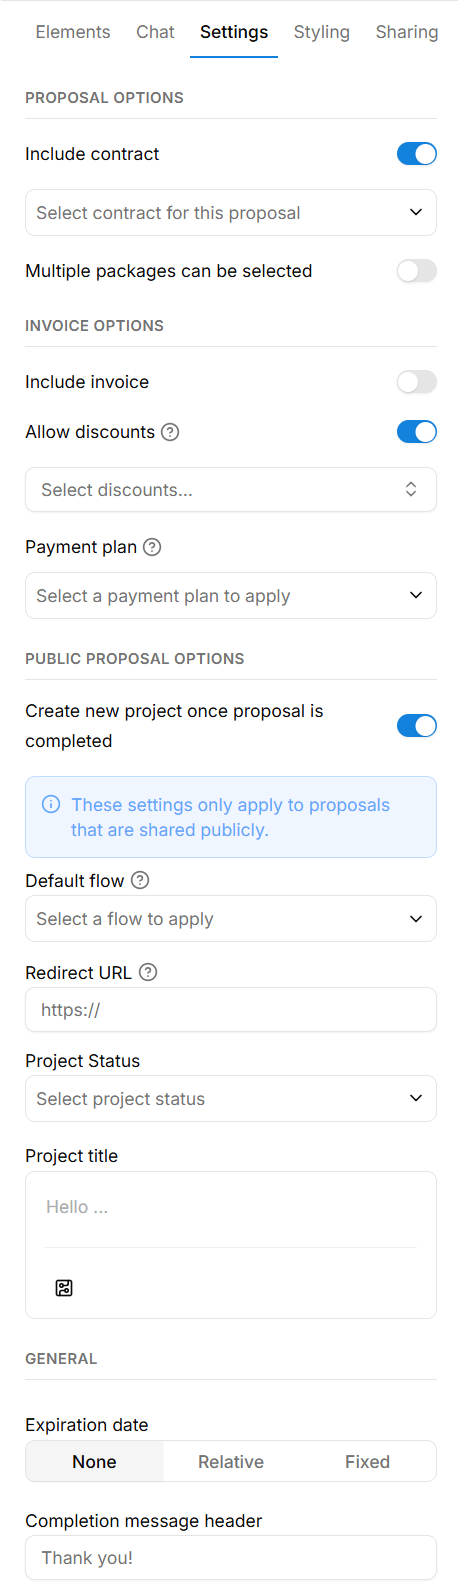
The form settings panel in the Dubsado form builder
Form Styling
This is where you control the visual settings that apply across the entire form - question styling: font size, font color, and top/bottom padding.
You can also add custom CSS here if you want more advanced styling options.
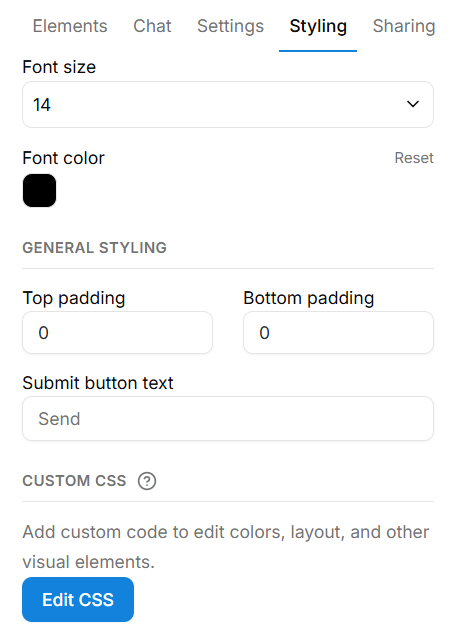
The form styling panel where you can set fonts, colors, and add custom CSS
Sharing
Once your proposal is set to public, this tab shows your embed code and direct link.
Both are click-to-copy, which sounds small but it’s one of the amazing improvements in the form builder.
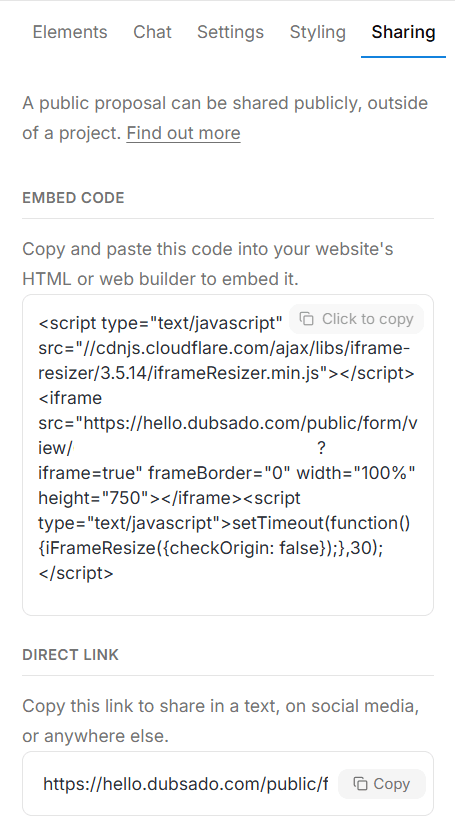
The public sharing panel with click-to-copy embed code and direct link
What the Form Builder Does Really Well
Design flexibility without code. Full-width containers, background images, nested sections - you can build forms that look like a proper website without touching CSS.
Inline editing. Making changes directly in the form is so much faster than the old way.
Less reliance on CSS templates. The form builder has reduced the need for coded templates significantly, which makes maintaining and updating your forms a lot easier.
Containers. I can't overstate how much containers changed the game for form design in Dubsado. Being able to span the full width of the page, add background colors and images is amazing.
What I'd Still Like to See
Better previews. The design view and the preview are quite different, so you end up previewing constantly to make sure things look the way you intended.
Column width control. Being able to set individual column widths within a container would open up a lot more layout options.
Saved color palettes. Having to punch in hex codes every time is tedious. A saved palette would be a nice time-saver.
FAQ
Does Dubsado have a drag-and-drop form builder?
Yes - Dubsado's form builder uses a drag-and-drop interface. You can drag elements from the library directly into your form or add them inline using the plus sign that appears when you hover over any element.
Do I need to know CSS to build forms in Dubsado?
No. The form builder gives you enough design flexibility to create professional, on-brand forms without any code. CSS is available if you want more advanced customization, but it's completely optional.
What types of forms can I build in Dubsado?
You can build proposals, contracts, questionnaires, lead capture forms, and sub-agreements. Each form type uses the same builder, so once you're comfortable with it the process is the same across all of them.
Can I use my own branding in Dubsado forms?
Yes - you can add your logo, brand colors, and images directly in the form builder. Using full-width containers with background images and custom colors makes it easy to create forms that feel like a natural extension of your website.
Video Tutorial: Dubsado’s Form Builder
In this video tutorial I’ll take you through the changes in Dubsado’s form builder. I'll show you how to use it to create beautiful forms without needing any CSS code.
How does your client experience actually measure up?
Wondering if your client experience is actually working the way it should? Take the free quiz to find out where things stand and what to do about it.
Want a Head Start on Your Forms?
If you'd rather not build everything from scratch, I have a template shop with done-for-you Dubsado form templates that are designed to be on-brand and easy to customize - no CSS required.
And if you'd rather hand the whole setup off entirely, that's what I do. I work with photographers and wedding planners to build out a full Dubsado setup so everything is ready to go from day one.
The first step is a free 20-minute discovery call.
